
How to Create a Supabase Account
Supabase is an all-in-one backend toolkit for modern apps. It handles your database, user logins, file storage, and the connections between your app and its data — all in one place. You'll own the account, and Dev3 Studio will use it to set up and manage the technical pieces of your project.
What You'll Need
- A company email address or GitHub account — whichever you use to sign up, make sure it's one your business controls long-term.
- Two-factor authentication turned on for whatever account you use to log in (your email provider or GitHub). This adds an extra layer of security.
- A name for your organisation — your company name works perfectly.
Expected Costs and Timing
Supabase has a free plan that works well for getting started and early development. Paid plans are available when your project needs more capacity, and you'll always be able to review the pricing before upgrading. The whole setup takes about 10 minutes. One thing to keep in mind: Supabase invitations expire after 24 hours, so let us know as soon as you've sent them so we can accept in time.

Step 1: Create Your Supabase Account
Go to the Supabase sign-up page and register using your company GitHub account or email address. If you sign up with email, you'll need to verify it before you can continue.

Step 2: Name Your Organisation
Supabase automatically creates an organisation for your new account. Go to the organisation settings and change the name to your company name. You'll be the Owner of this organisation — that means you have full control over billing, membership, and everything else.
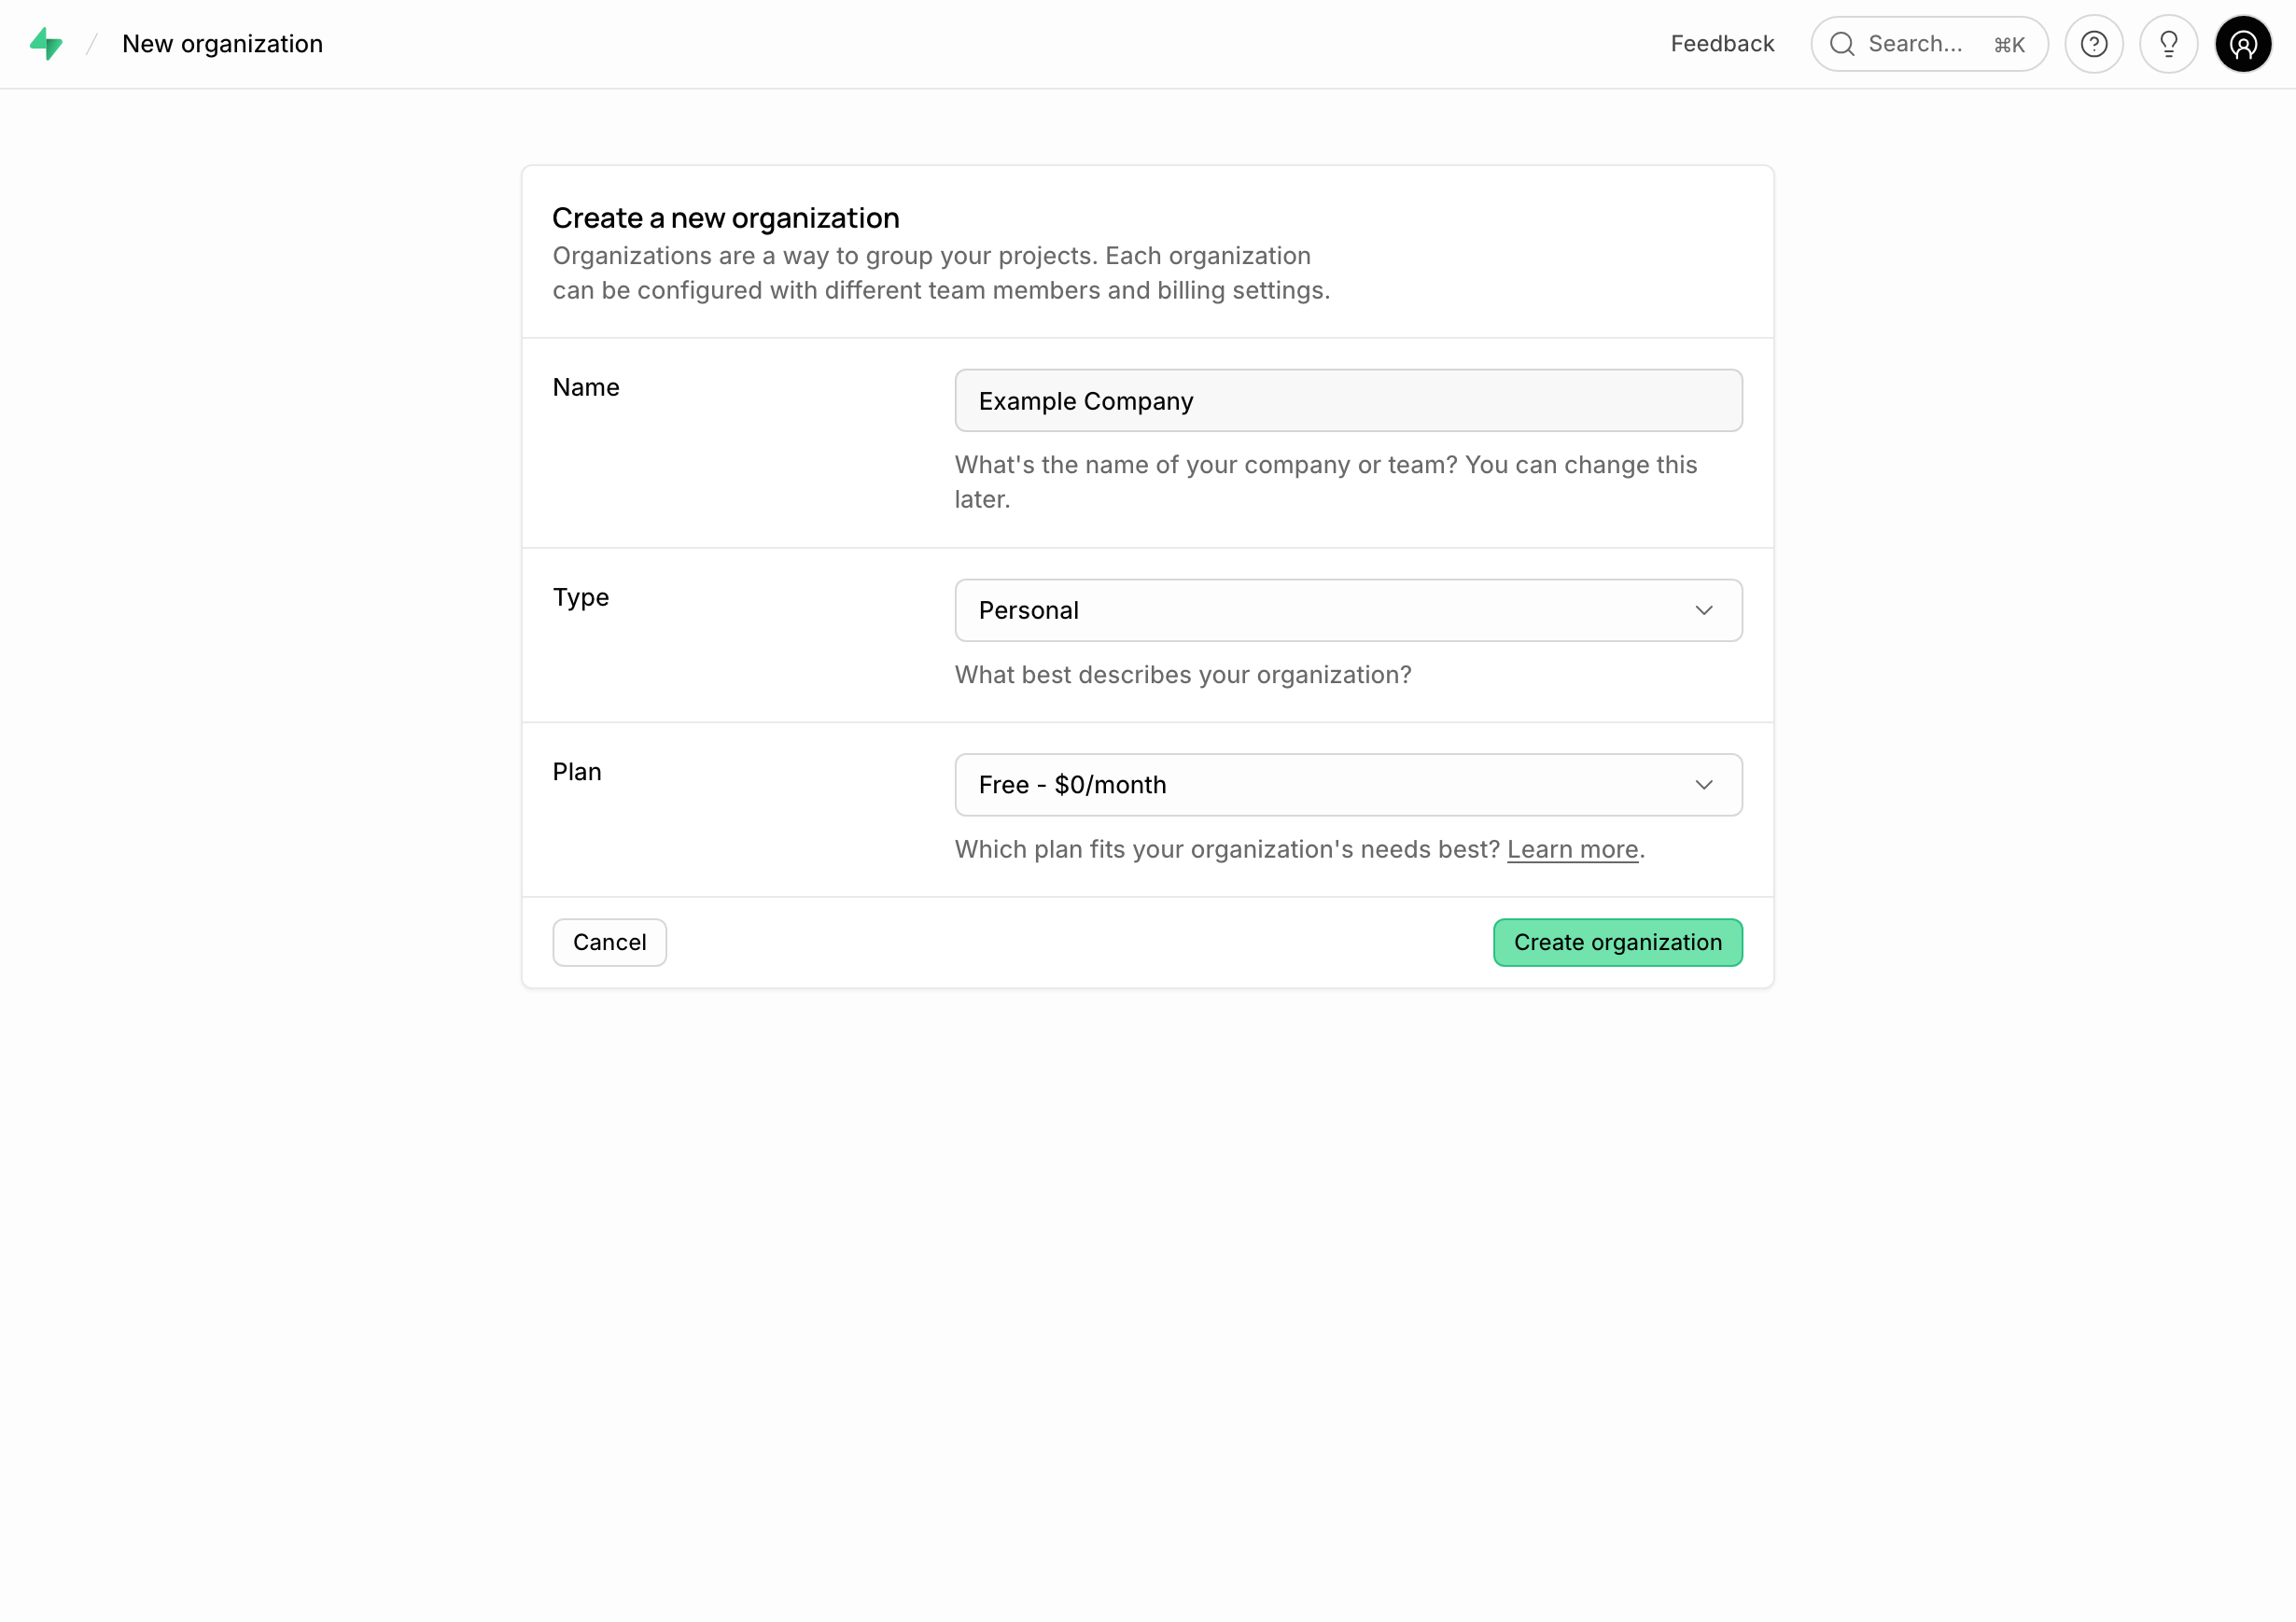
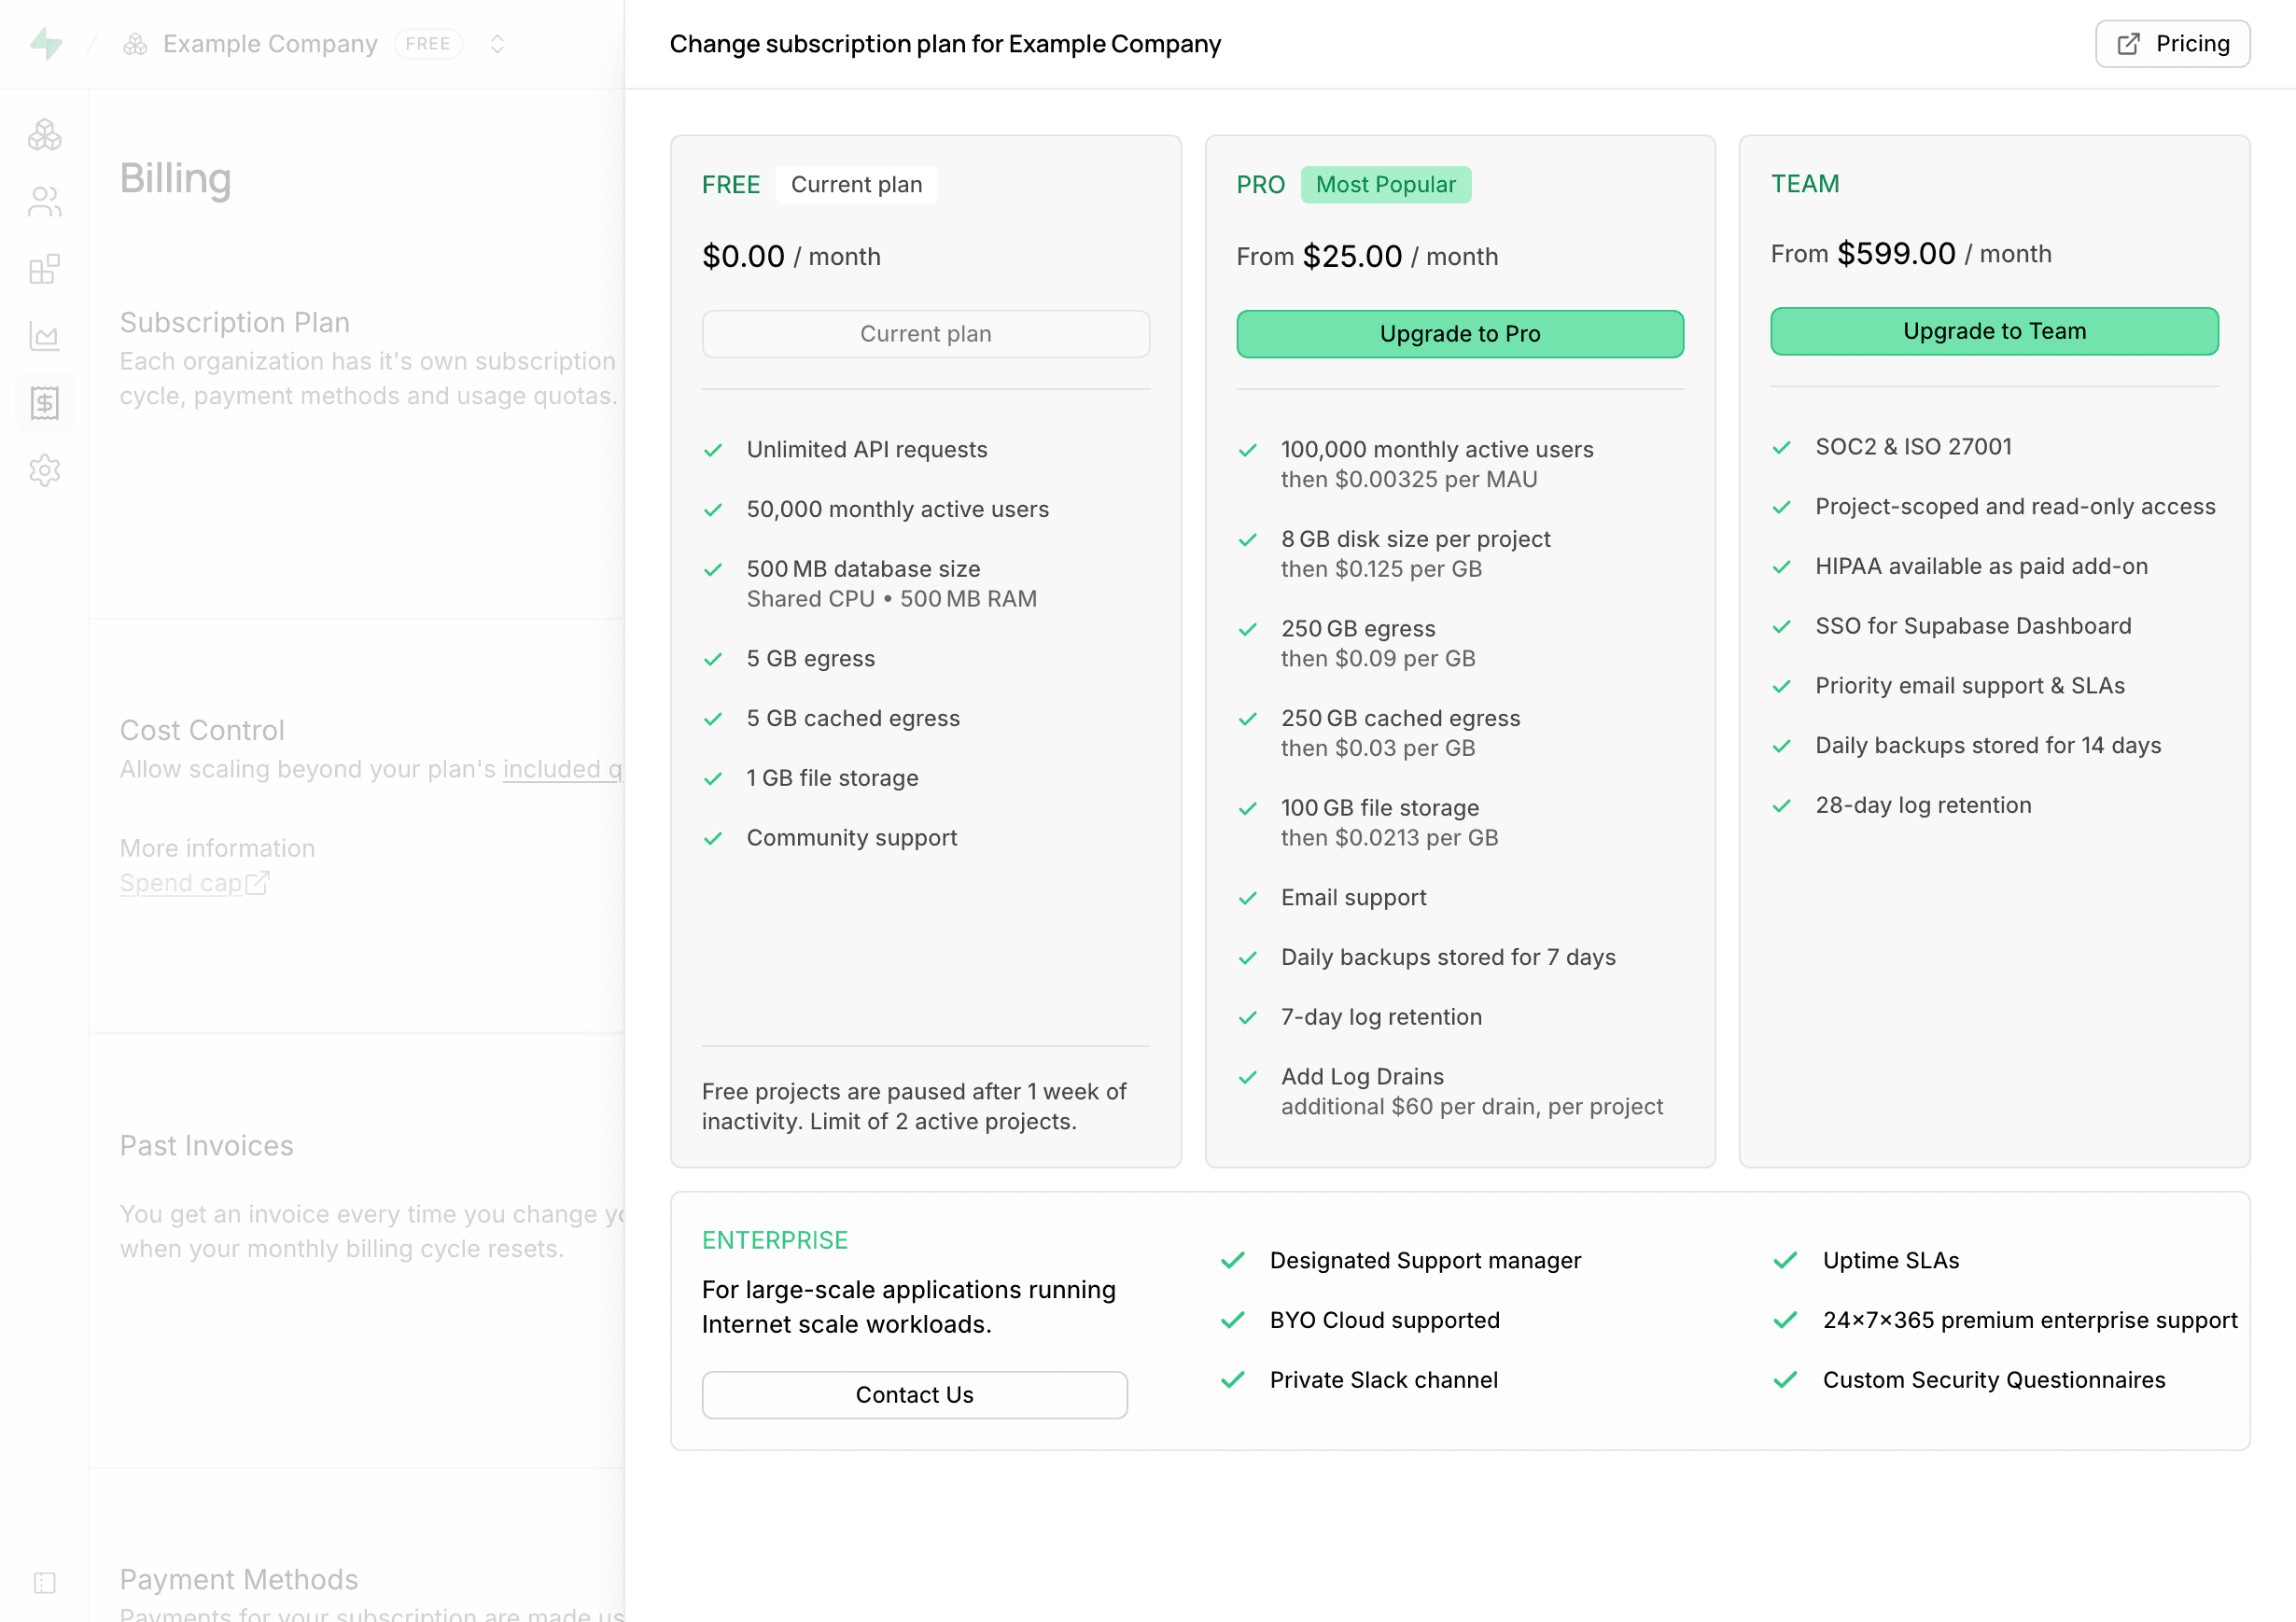
Step 3: Review the Plan and Billing
Open your organisation's billing settings and take a look at the available plans — Free, Pro, Team, and Enterprise. There's no need to upgrade right now unless we've discussed it. If you do add a payment method, make sure it's one your business controls.
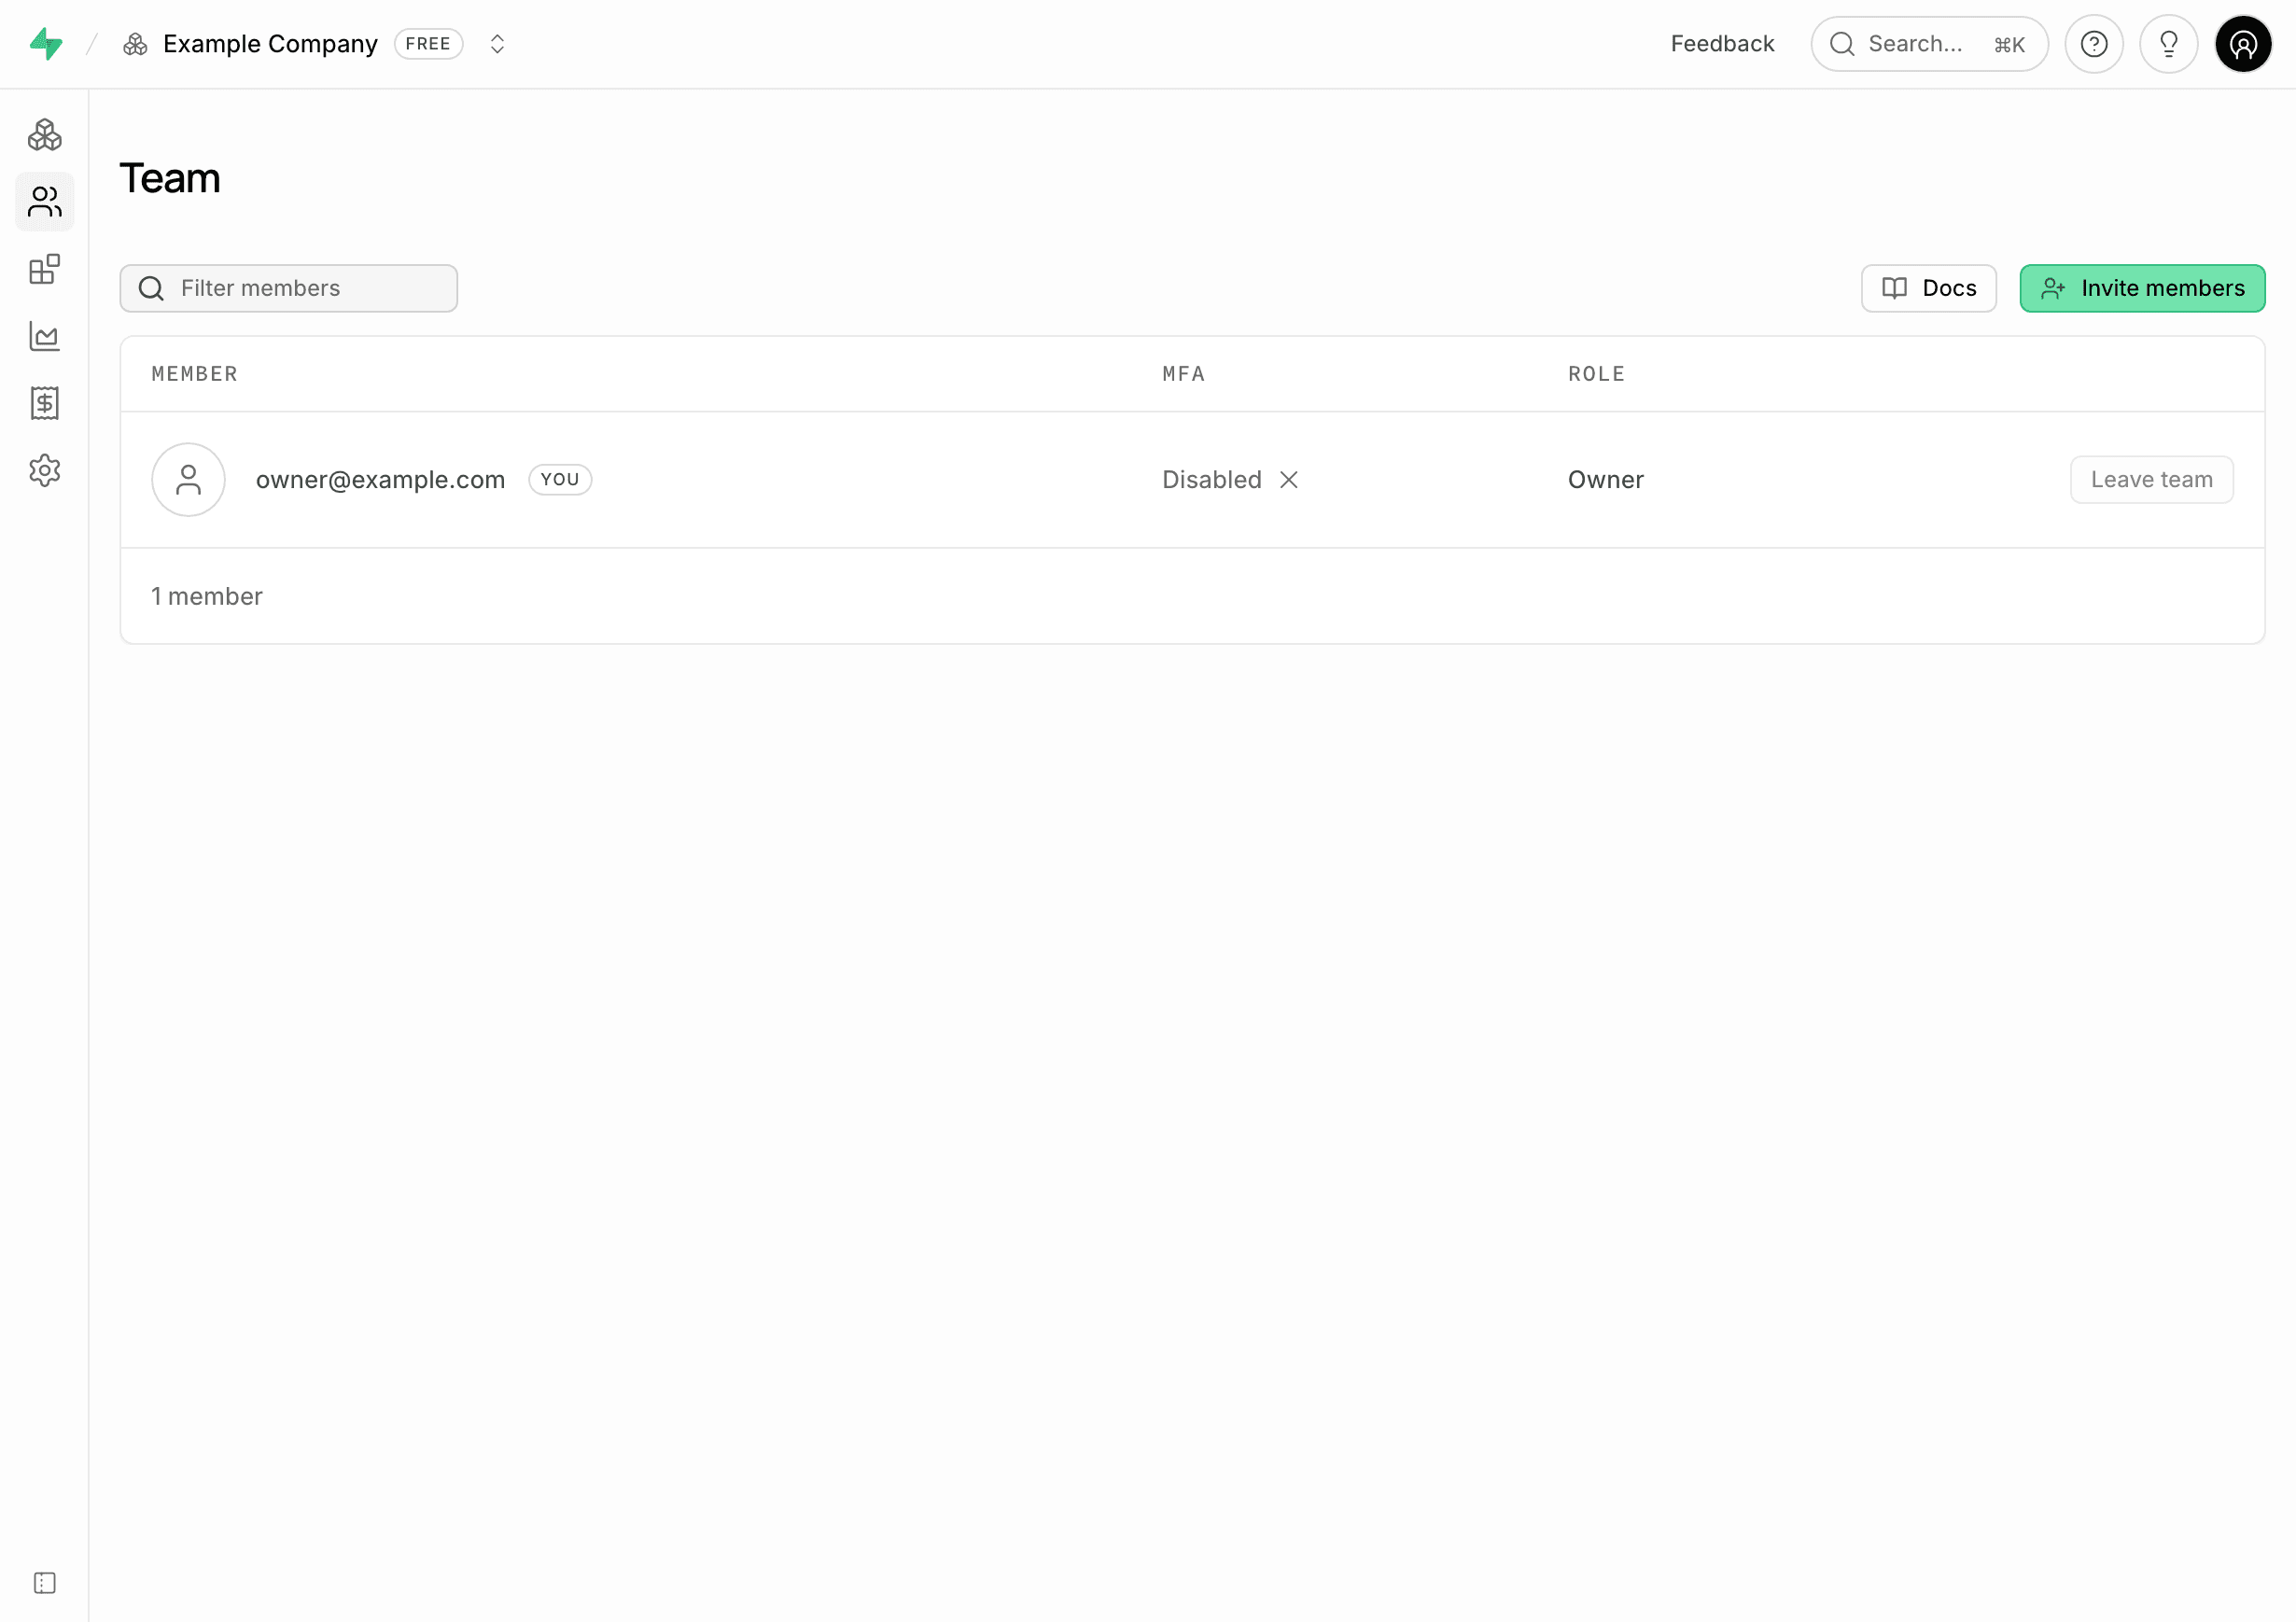
Step 4: Open Team Settings
Make sure you're in the correct organisation, then go to Team or Team Settings and click Invite member.
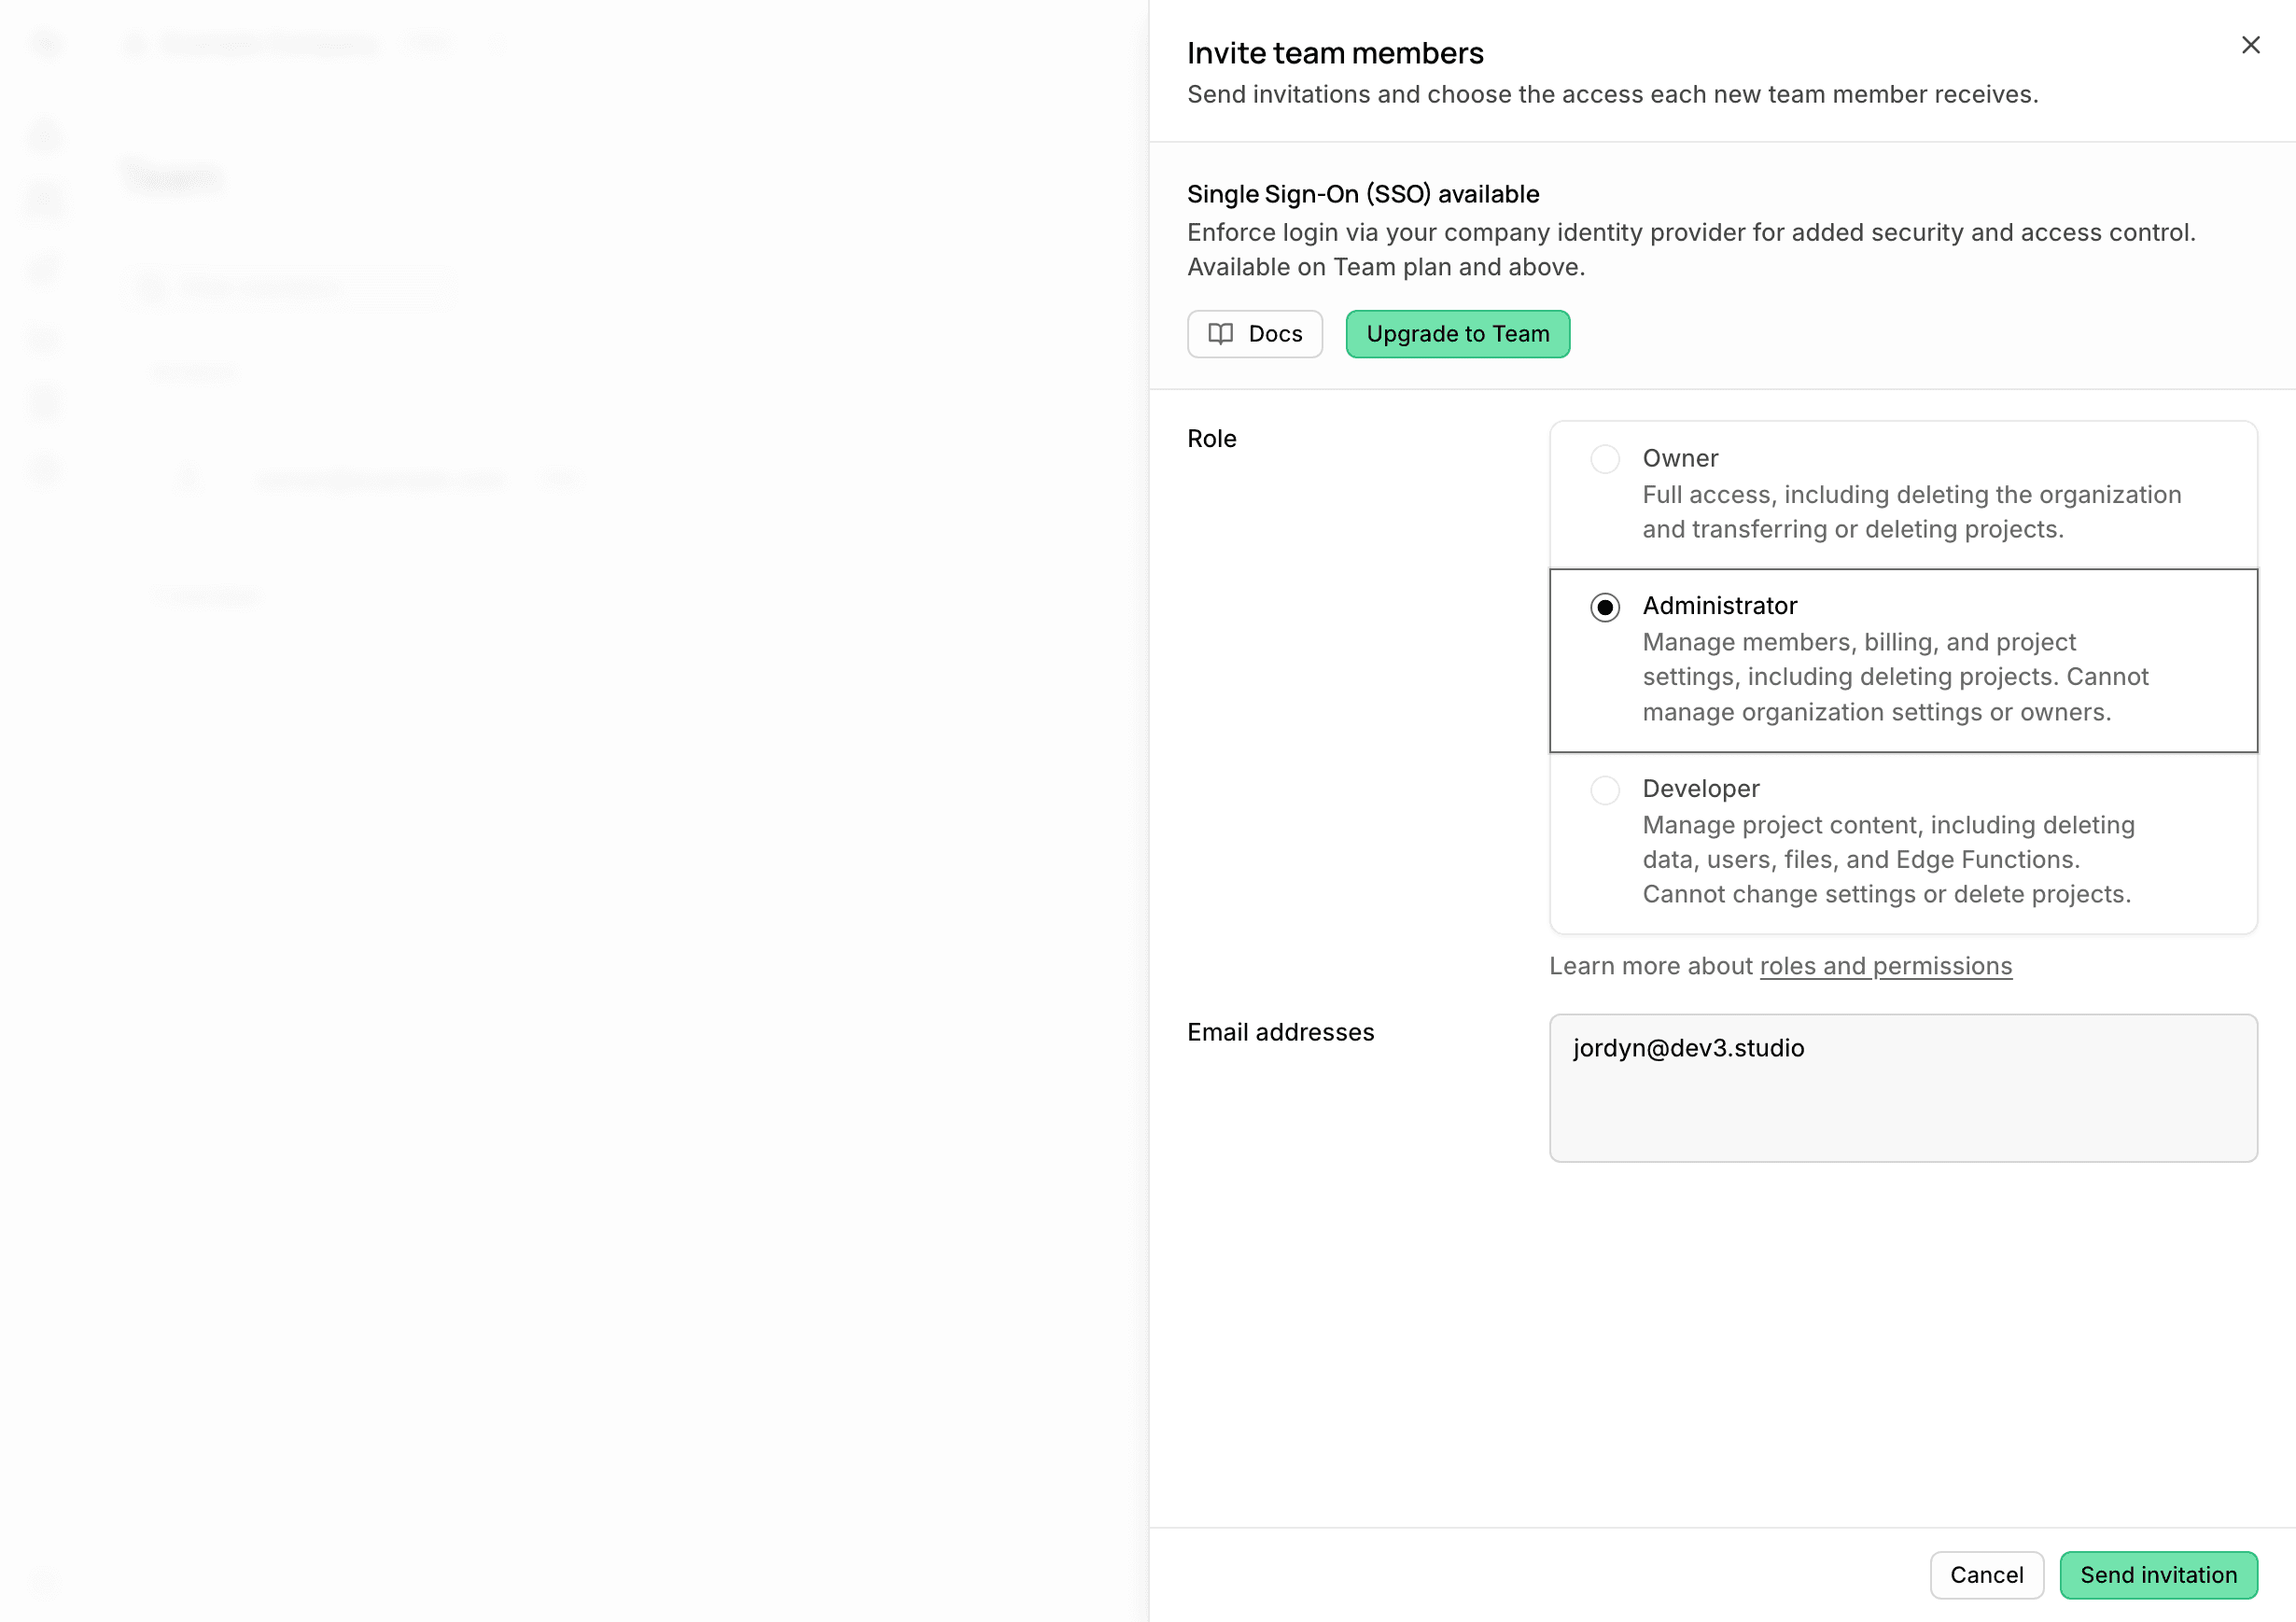
Step 5: Invite the First Dev3 Studio Team Member
Enter the first of the two Dev3 Studio email addresses we've given you, choose the Administrator role at the organisation level, and send the invitation. The Administrator role lets us create and manage projects for you. If you don't have our team's email addresses to hand, just ask and we'll send them through.
Step 6: Invite the Second Dev3 Studio Team Member
Do the same thing for the second address — choose Administrator and send the invitation. Since Supabase invitations expire after 24 hours, please let us know once both are sent so we can accept them in time.
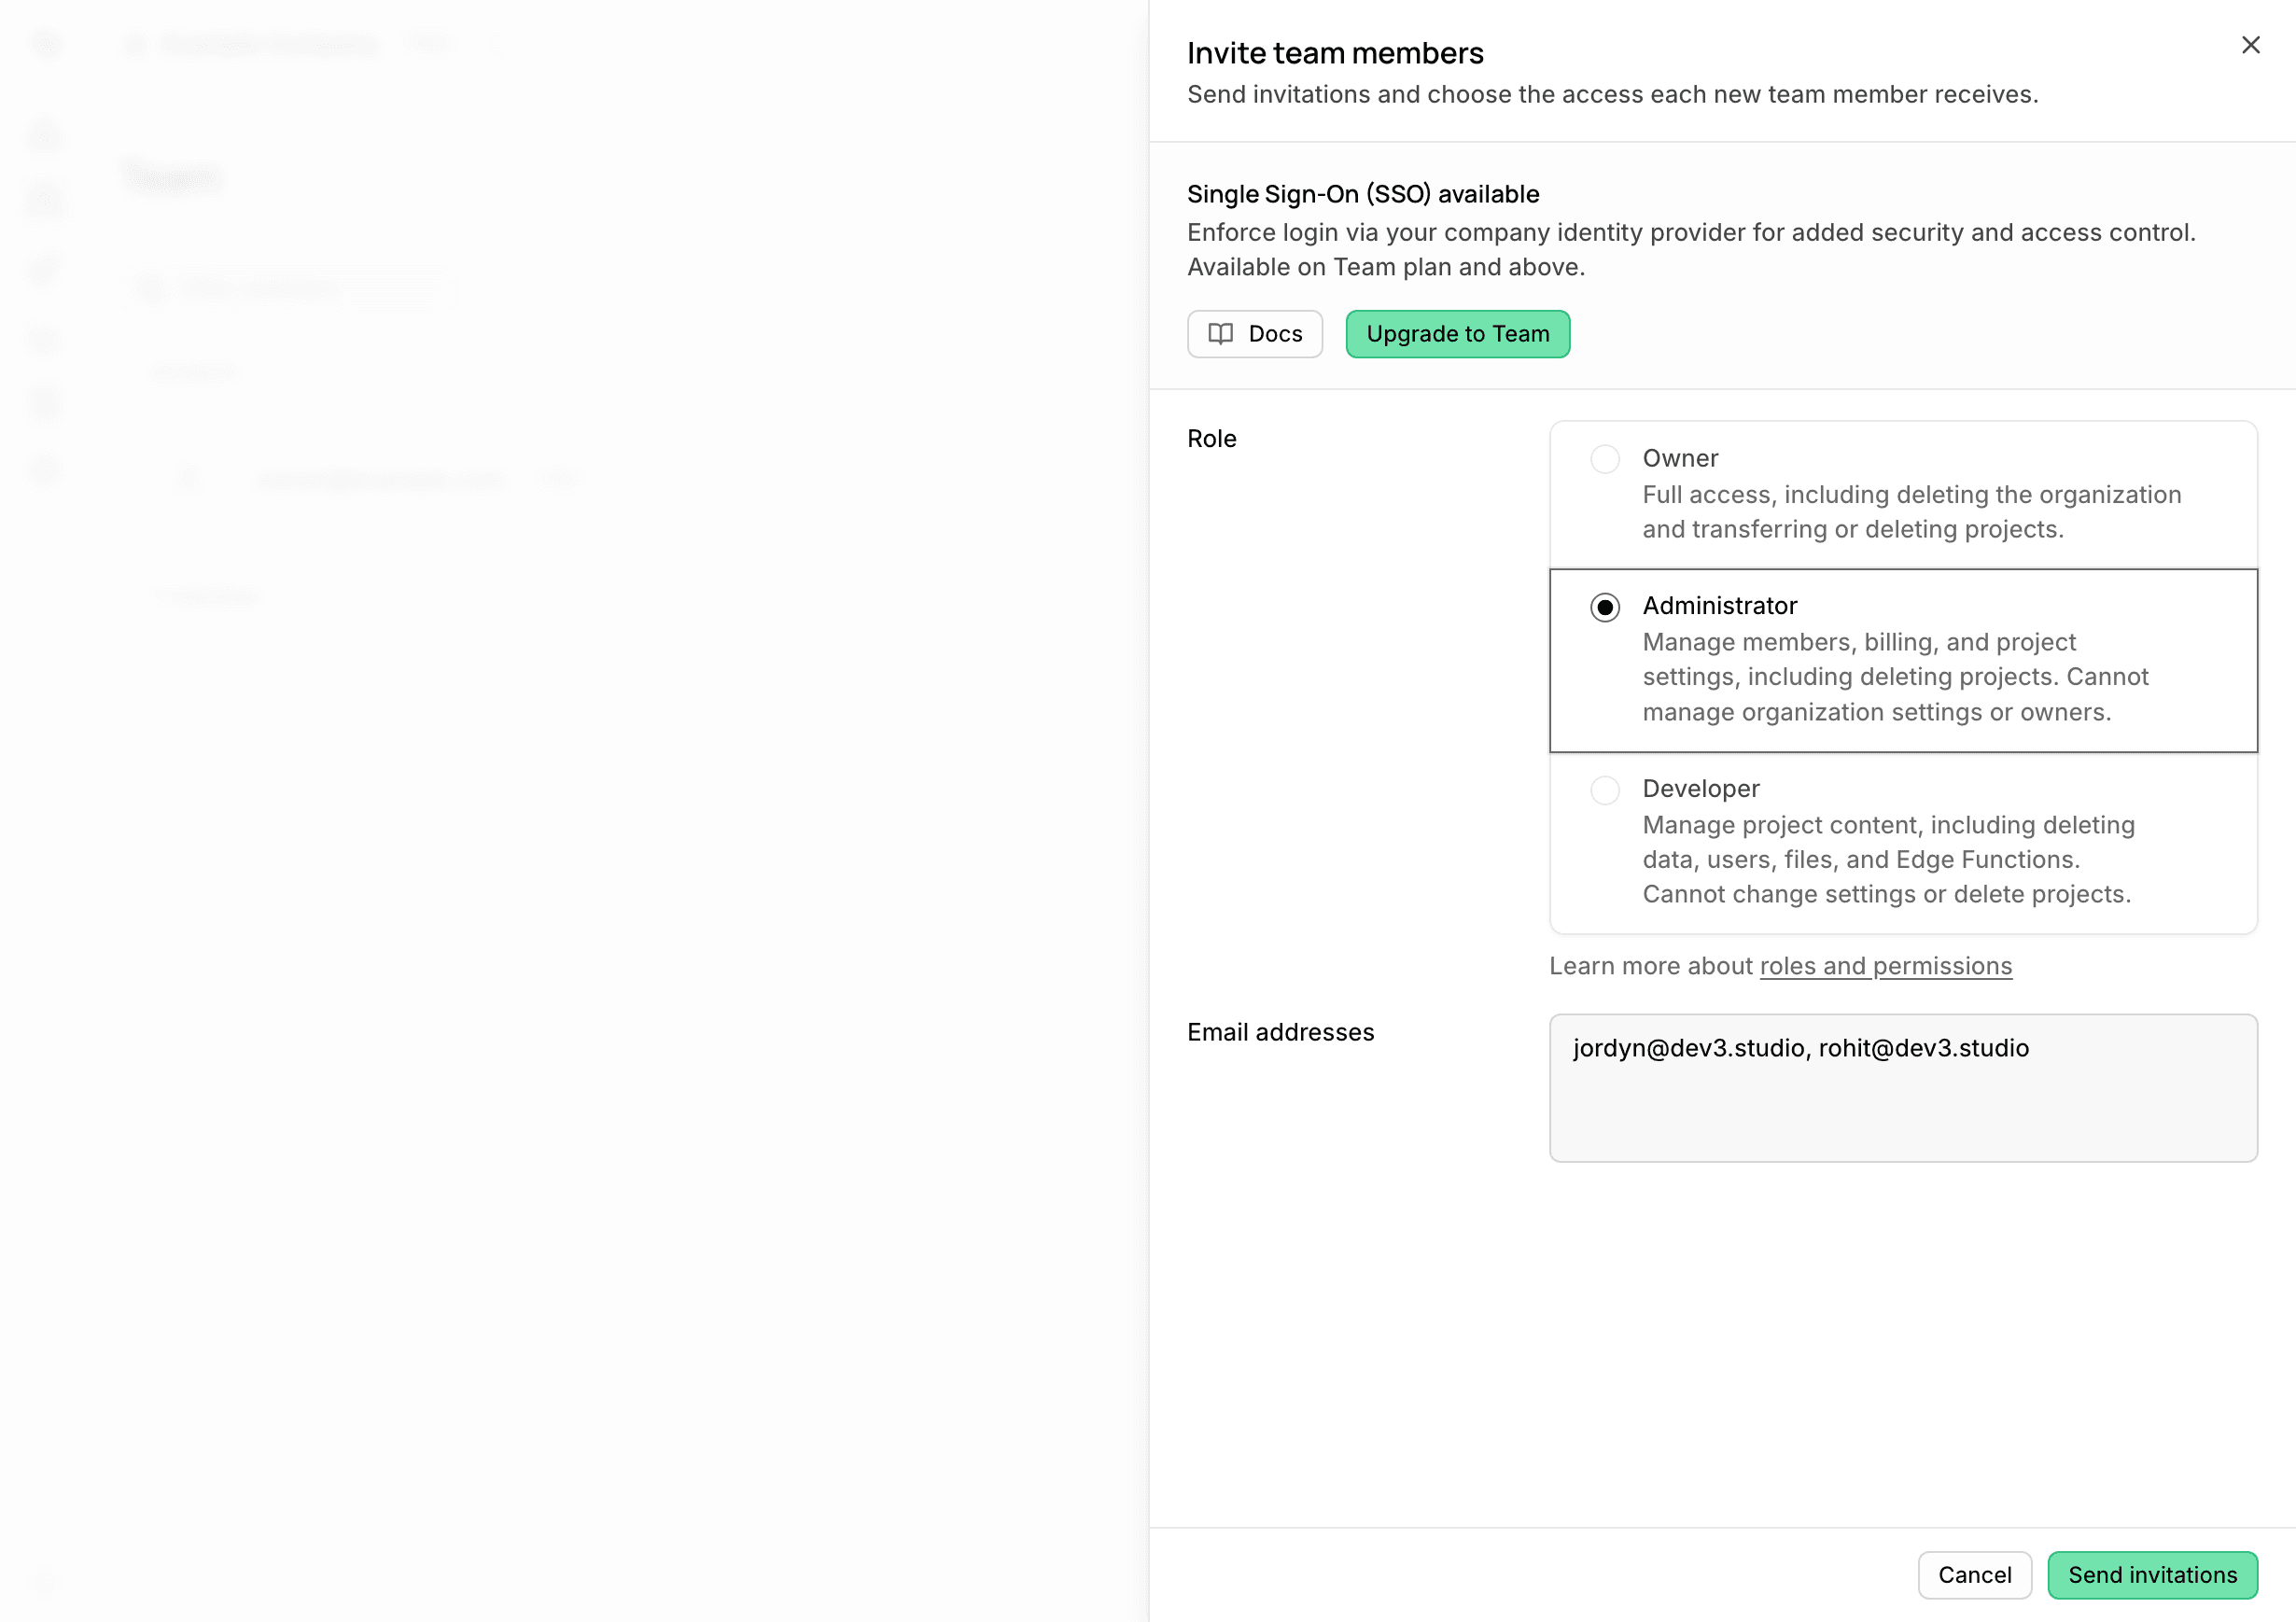
As Administrators, we can create and configure projects, manage databases, and handle the day-to-day technical work. We can't add new Owners or take over your organisation. That said, the Administrator role is quite broad — it can include some billing-related actions — so it's good practice to keep an eye on your subscription page from time to time.
Completion Checklist
Troubleshooting
- An invitation expired: No problem — just go back to Team Settings and resend it. They only last 24 hours.
- You can't find the organisation: Make sure you're logged into the right Supabase account and have the correct organisation selected in the top-left dropdown.
- A role you expected isn't available: Some roles are only available on certain plans, or only at the project level rather than the organisation level. If something looks wrong, get in touch with us and we'll help sort it out.
Security Reminder
You're always in the driver's seat. As the Owner, you control the organisation, its billing, and who has access. We recommend keeping two-factor authentication turned on and reviewing your team list from time to time. If you ever want to remove someone's access, you can do it instantly from the Team Settings screen — no need to ask us first.