How to Create a Google Cloud Account
Google Cloud Platform (GCP) is Google's cloud infrastructure — think of it as renting space in Google's data centers. It can run servers, databases, storage, and networking for your project. If your app needs cloud hosting or services that go beyond what a simpler platform provides, Google Cloud is likely where it will live.
This guide walks you through creating your own Google Cloud account, setting up a project, and giving Dev3 Studio the access we need to start building. You'll own the account, the billing, and the project the entire time. Dev3 Studio gets enough access to do the technical work, but you stay in charge of payments and overall control.
Before You Begin
- A company-controlled Google Account — use a permanent business email, not a personal Gmail. This account will be the owner of everything.
- 2-Step Verification turned on — this protects your account with an extra layer of security. You can enable it in your Google Account settings.
- A payment card — Google needs this to verify your identity and for any future usage charges. You won't be charged just for creating the account.
- A project name in mind — pick something clear, like "Example Company Production" so it's easy to find later.
Expected Costs and Timing
Creating a Google Cloud account and project is free. Google may offer trial credit when you sign up — the amount and expiry date can change, so check what's available when you register. After the trial, you only pay for the services you actually use. We'll always discuss expected costs with you before turning on paid services.
The signup process takes about 10-15 minutes. Setting up billing and access permissions is quick, though it can take a few minutes for permission changes to fully take effect.
Step 1: Start Google Cloud Registration
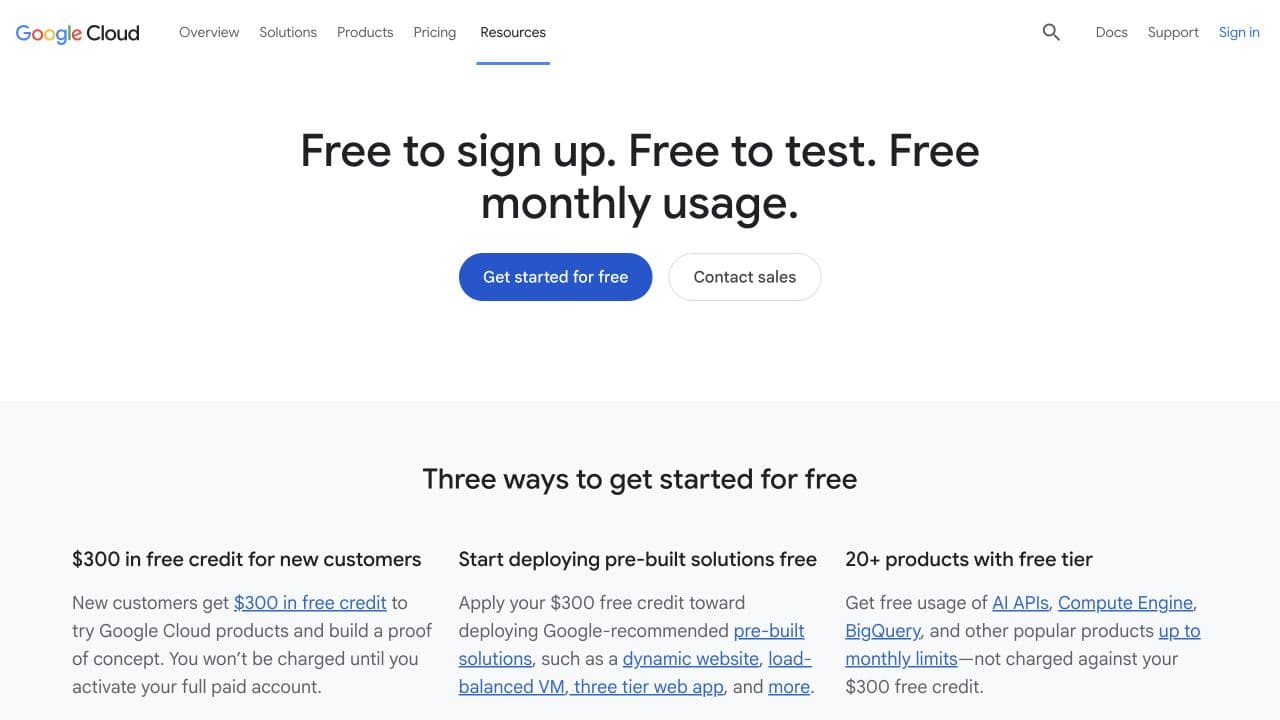
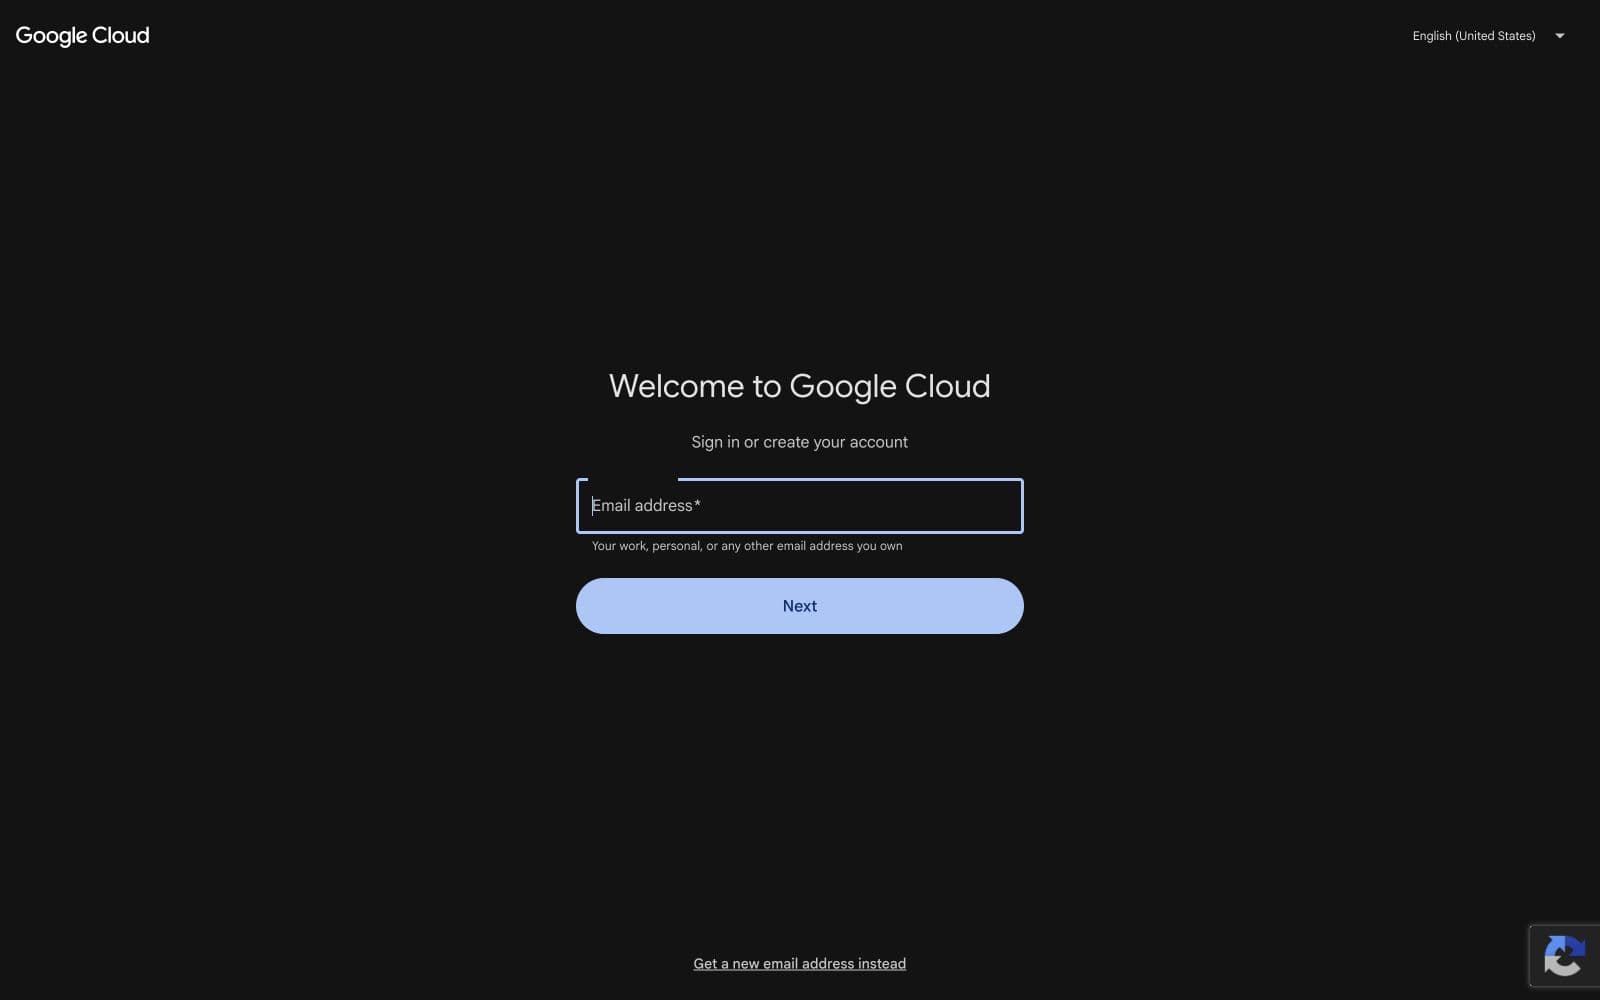
Open Google Cloud's free trial page, have a look at the current offer, and click Get started for free. Google will ask you to sign in with your Google Account (or create one if you don't have one yet).
Step 2: Create the Billing Account
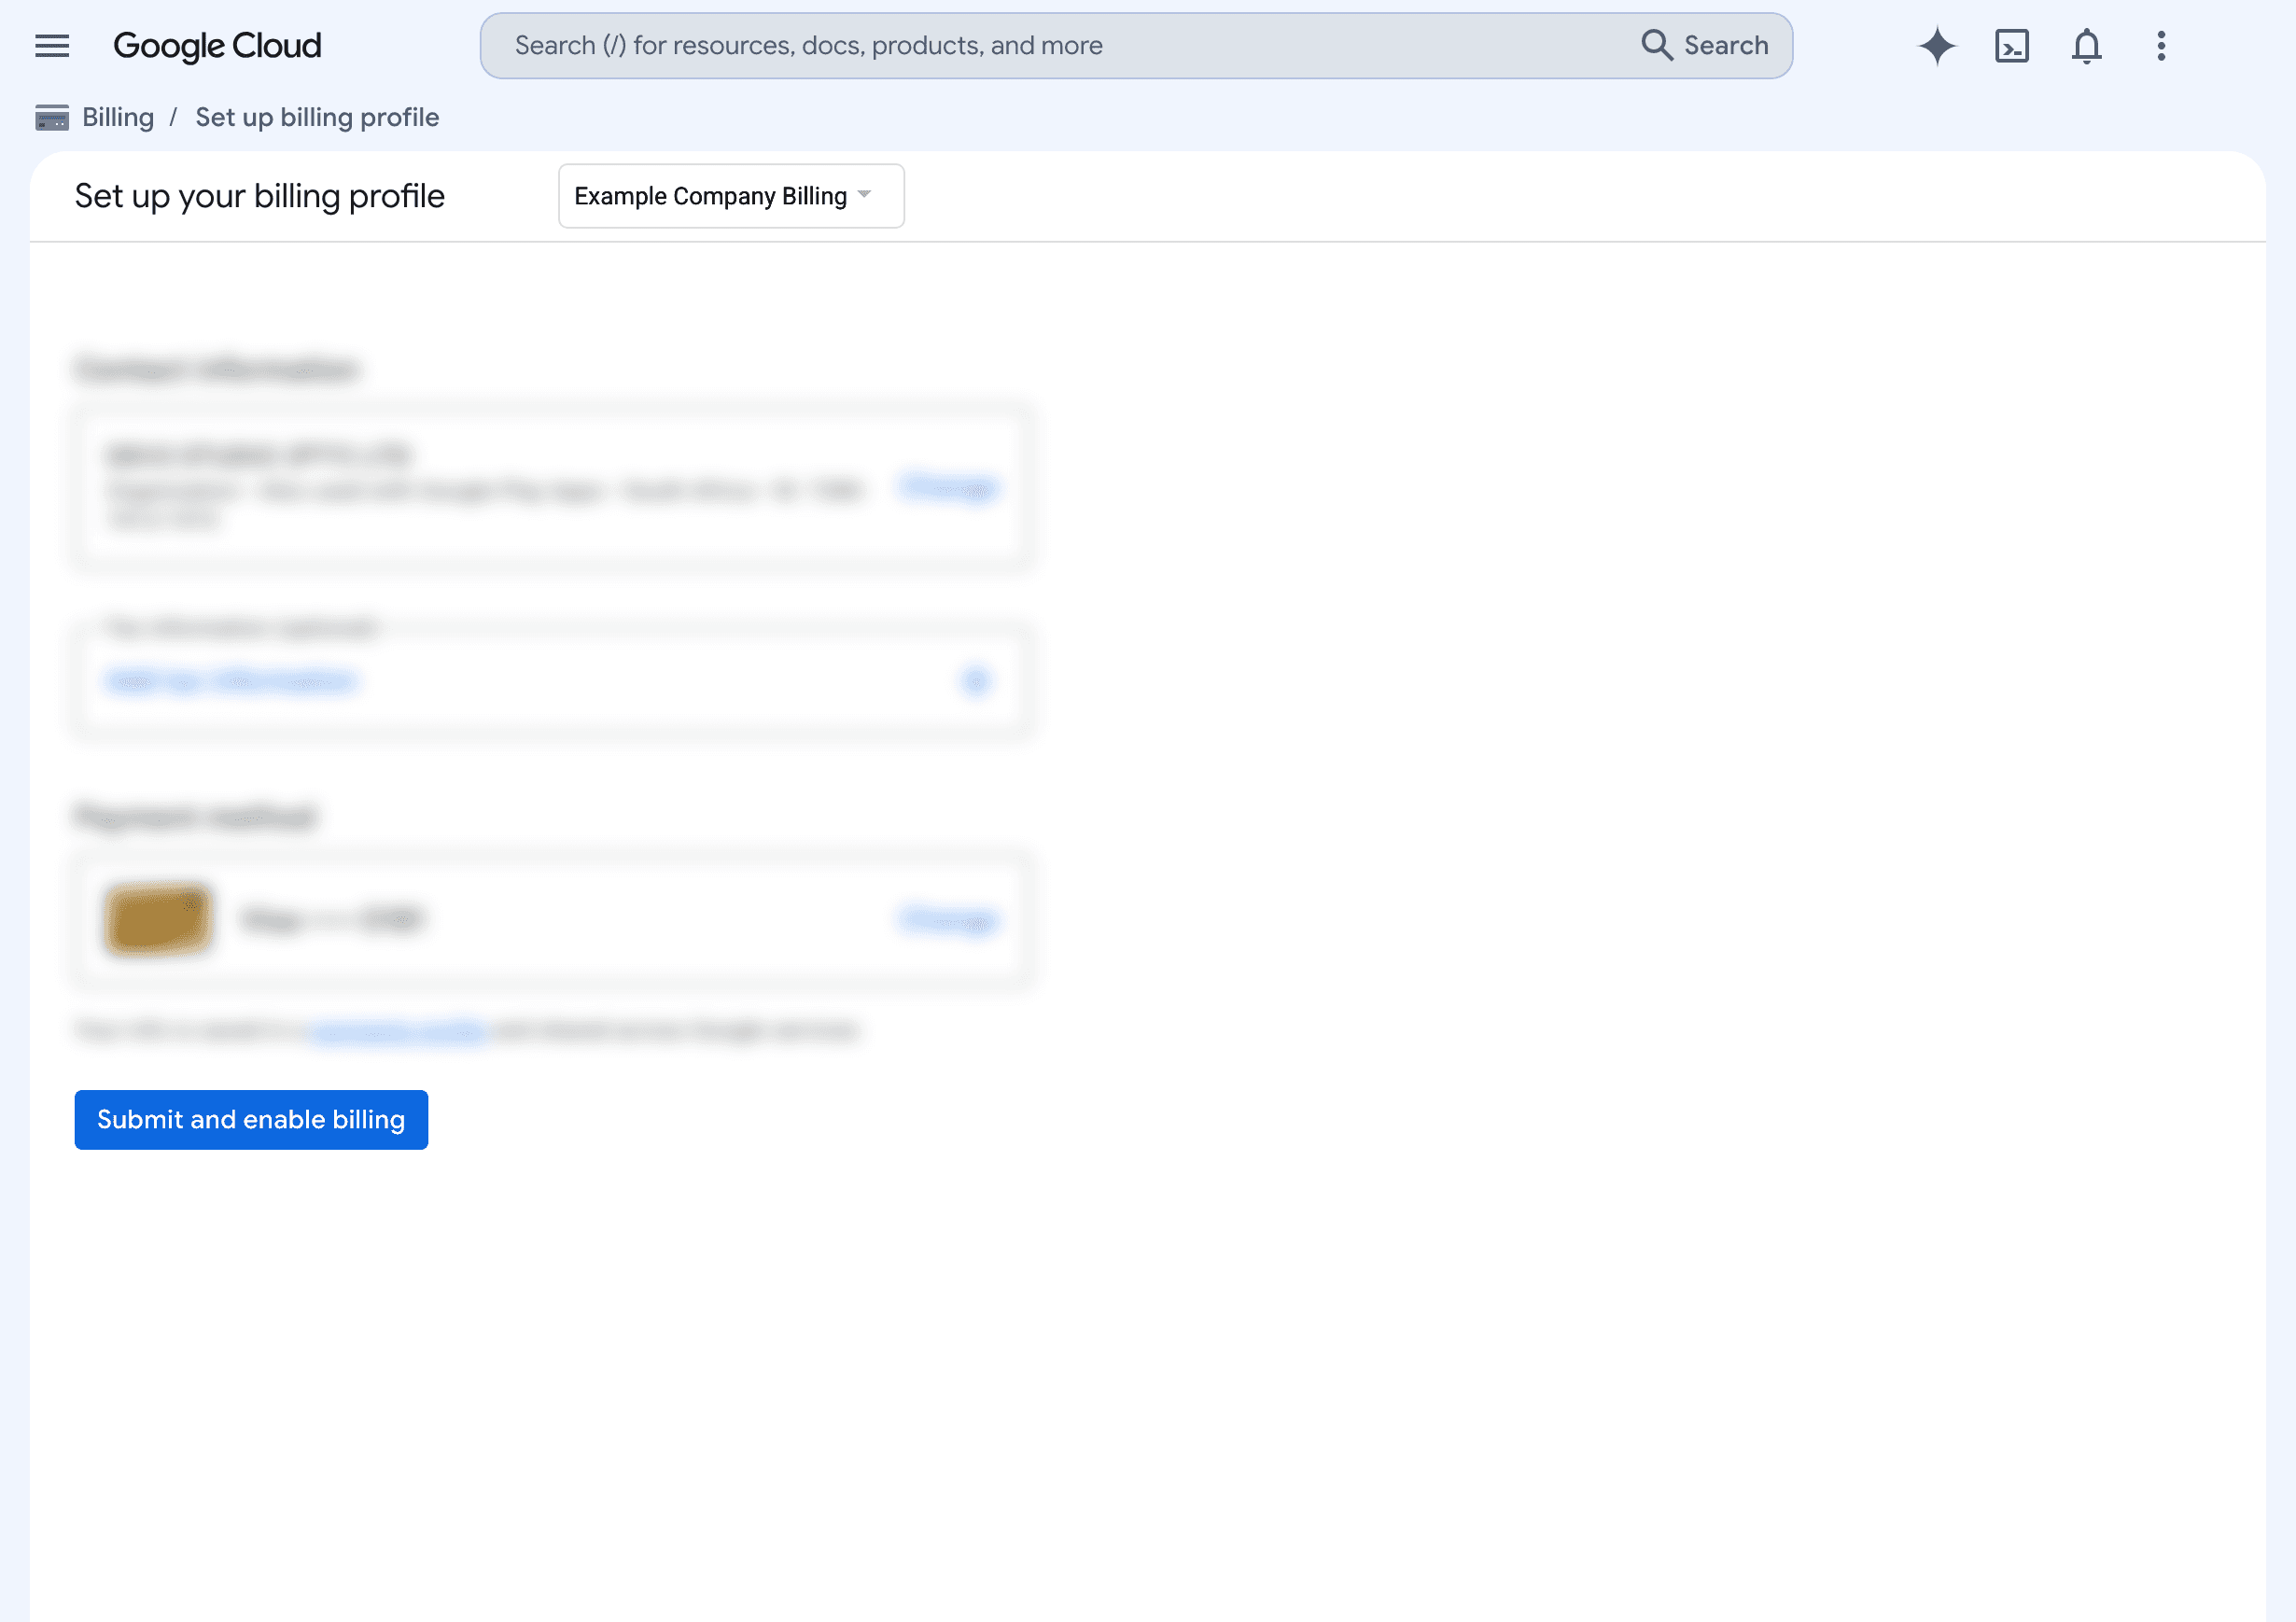
Google will walk you through setting up billing. You'll need to enter your country, whether this is for a business or personal use, tax details, your address, and a payment method.
Take a moment to read the terms before submitting. This billing account is where any future charges will go — and you'll be the only one with full control over it.
Step 3: Create the Starter Project
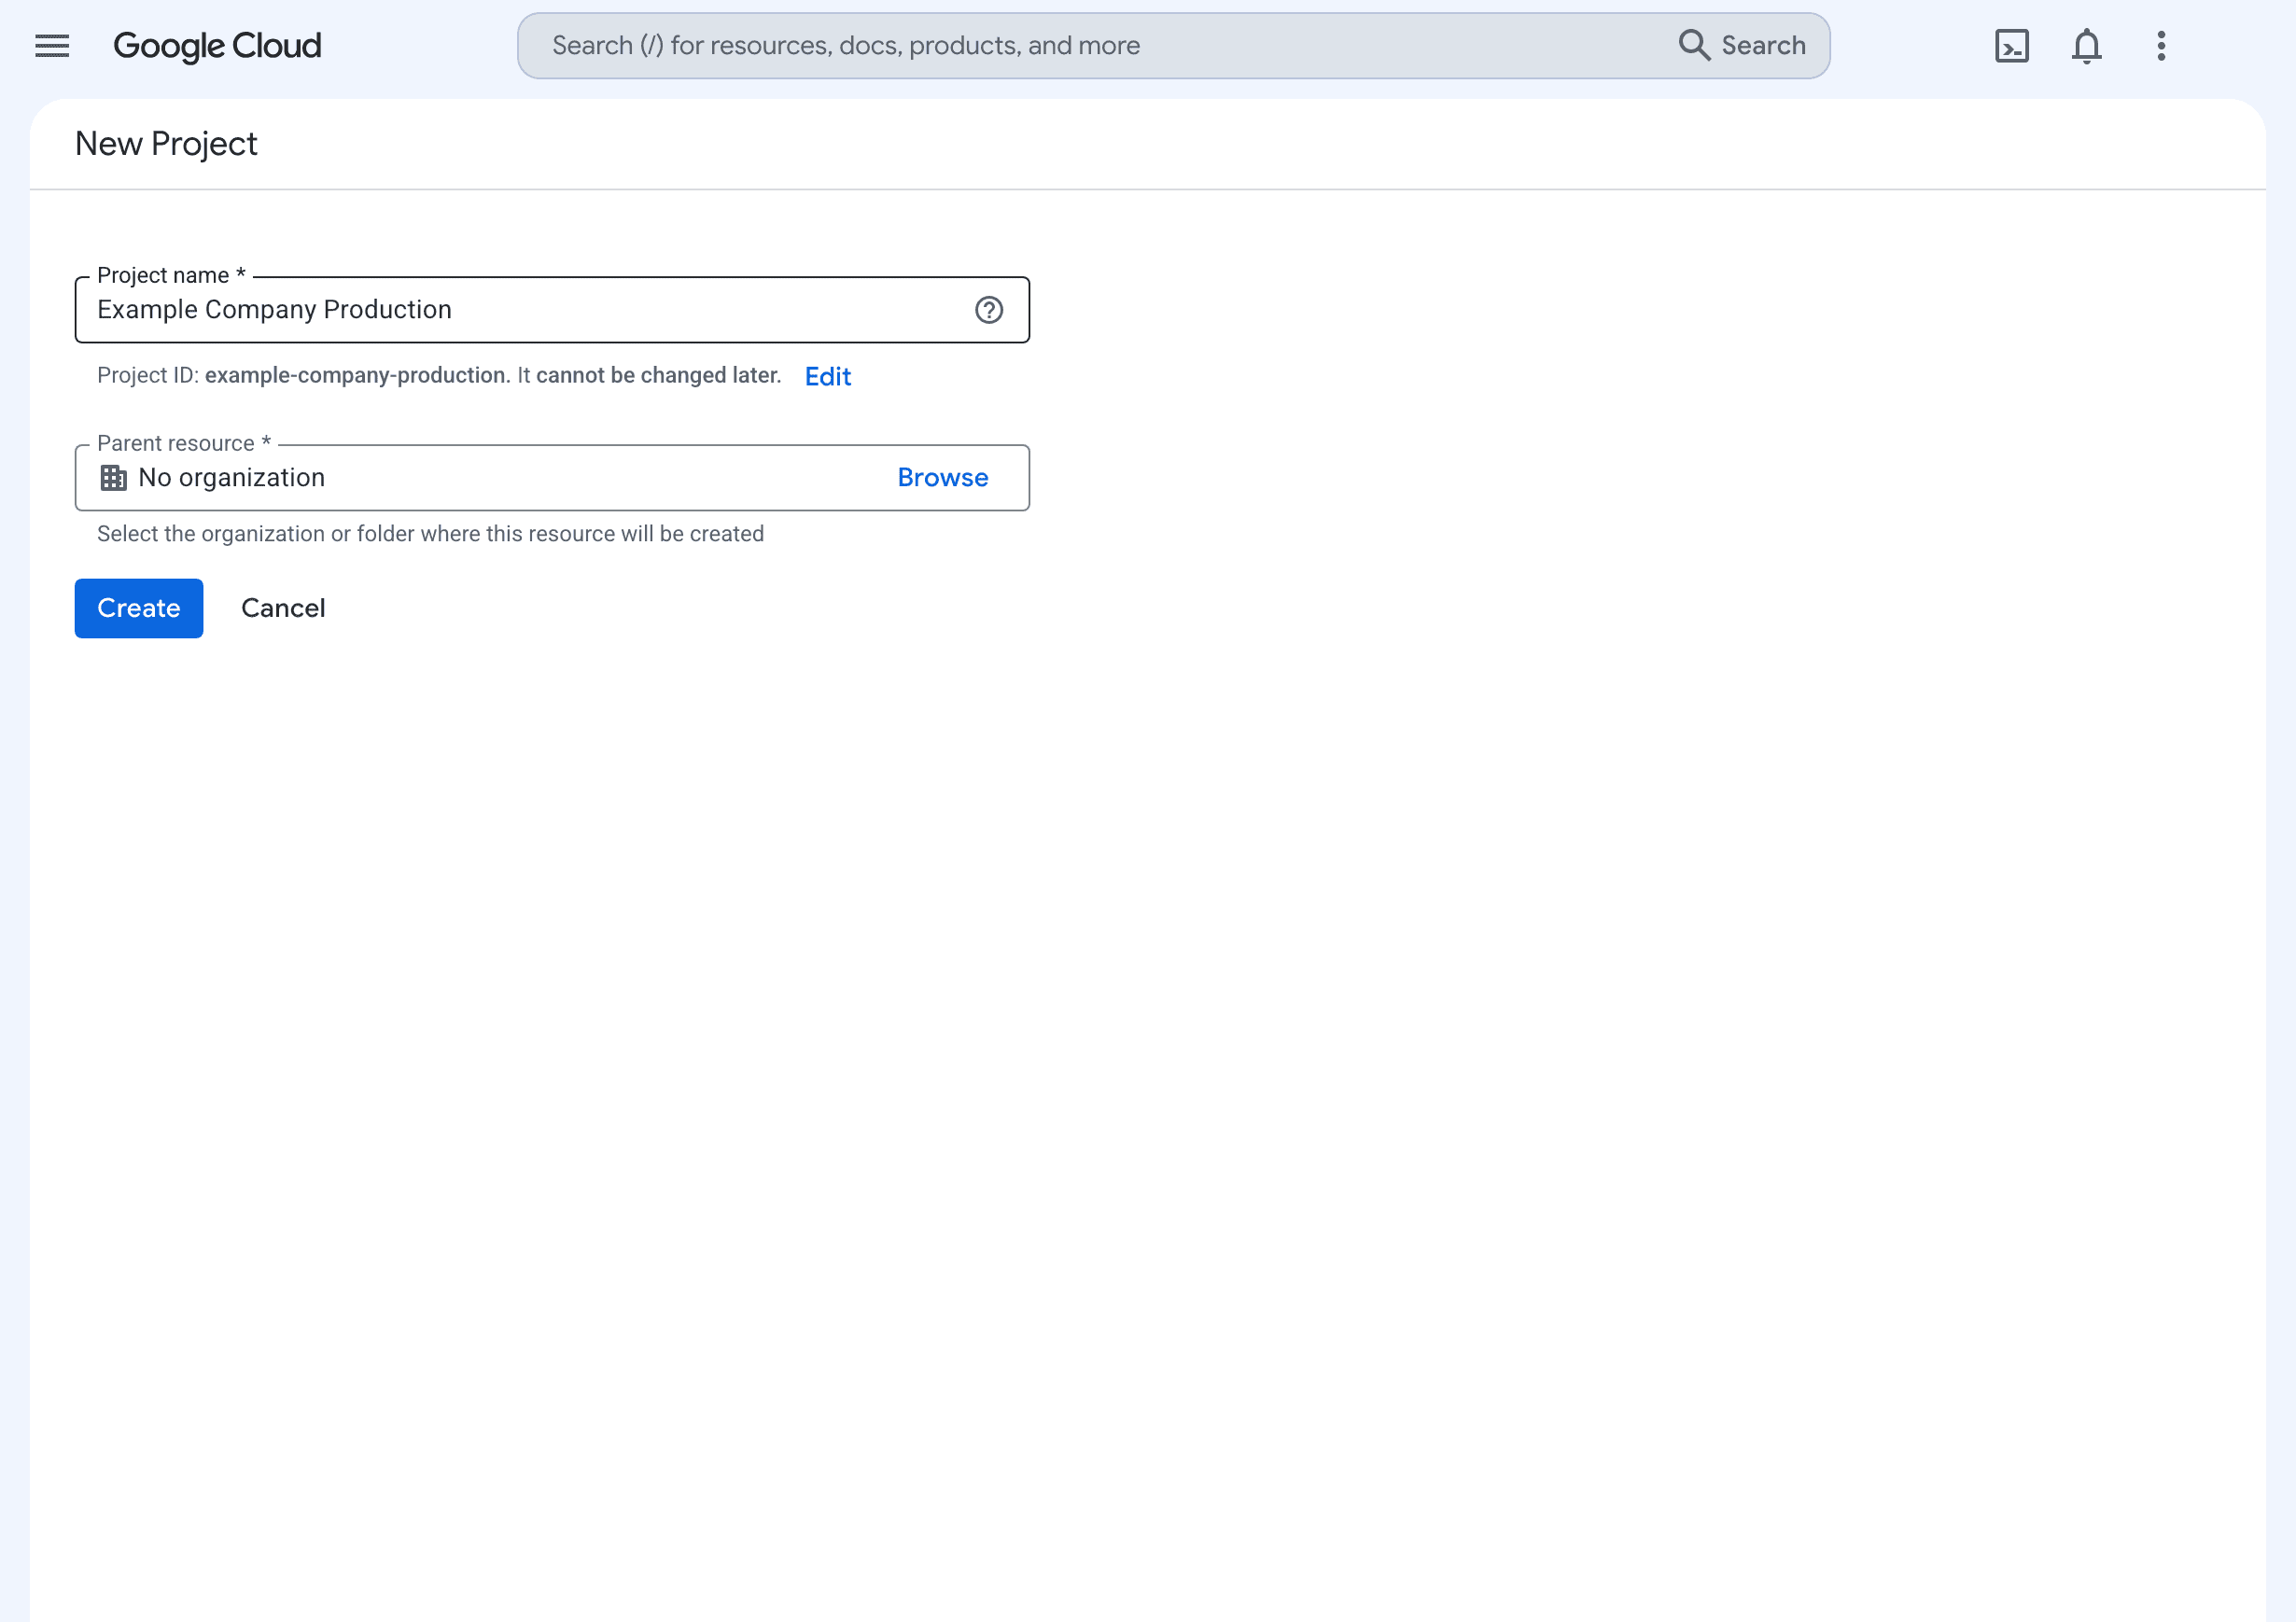
Now you'll create a project — this is like a container that holds all the cloud services for your app.
Click the project selector at the top of the page, choose New Project, and type in a clear name (like "Example Company Production"). If you see an organization listed, select it. Then click Create.
Step 4: Link the Project to Billing
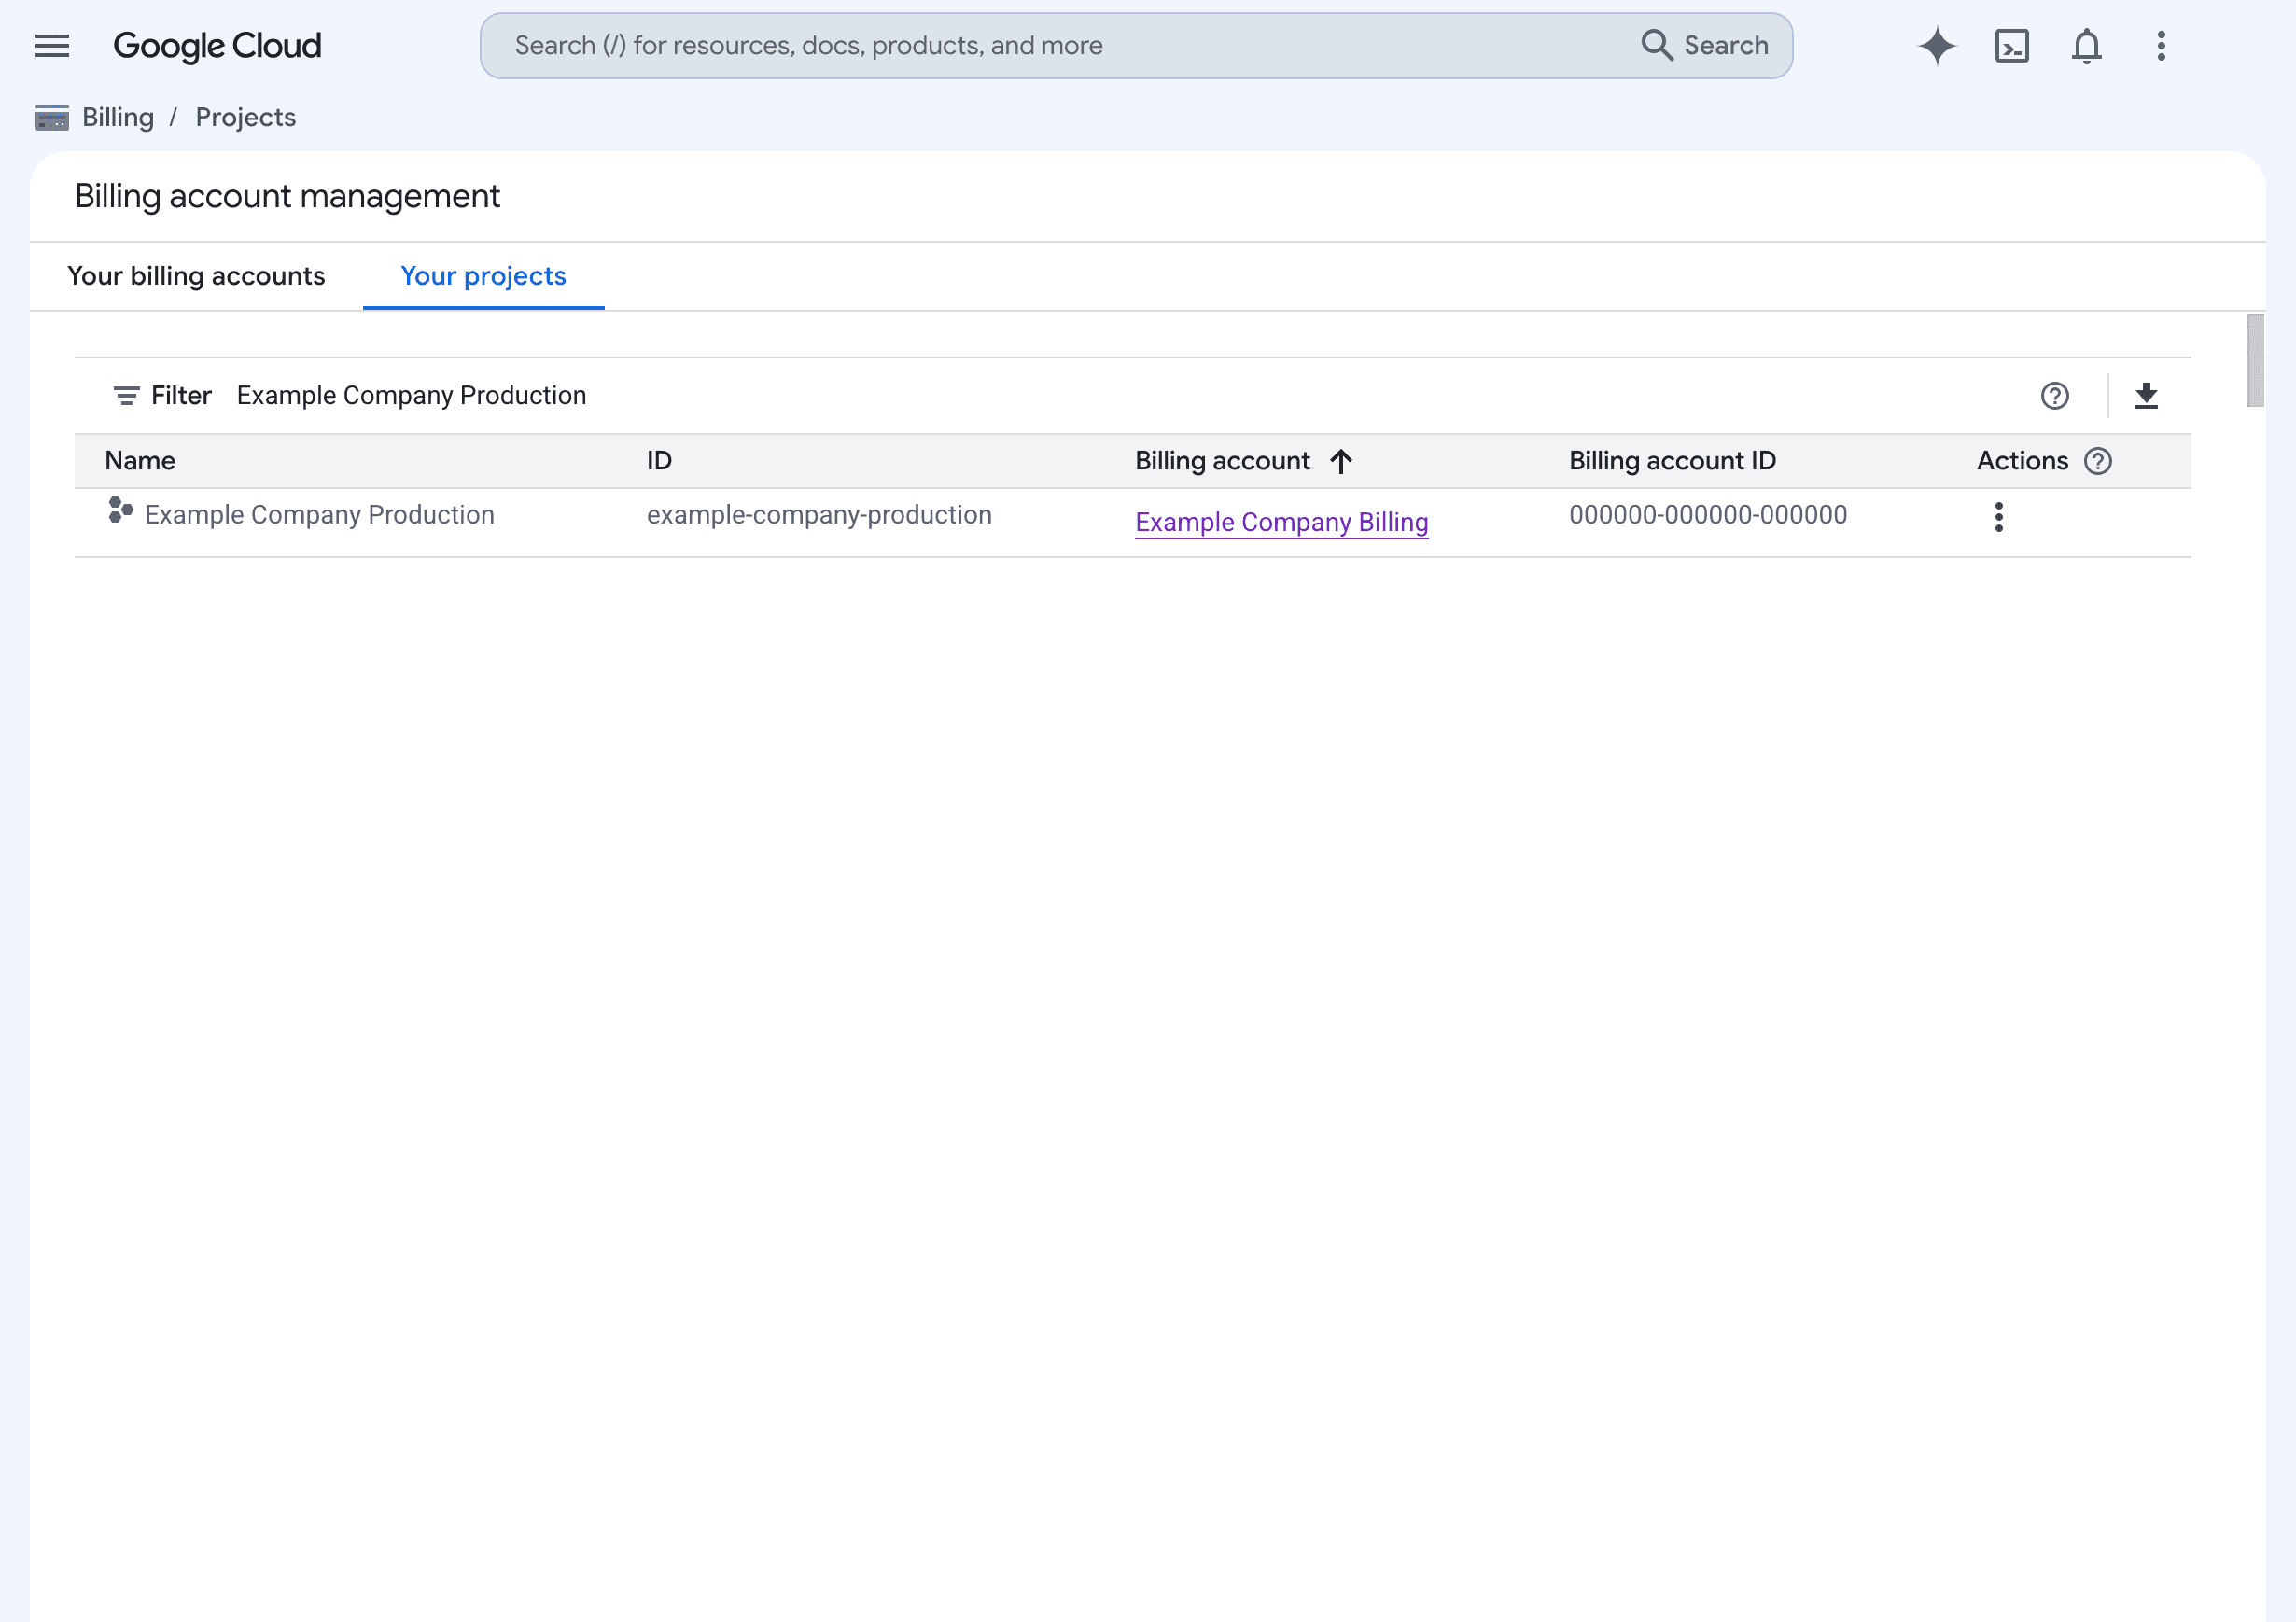
Your project needs to be connected to your billing account so that paid services can be used when the time comes.
Go to Billing in the left menu, select your new project, and link it to the billing account you just created. After linking, confirm that the project shows up under My projects for that billing account.
Step 5: Grant Project Owner to the First Dev3 Studio Team Member
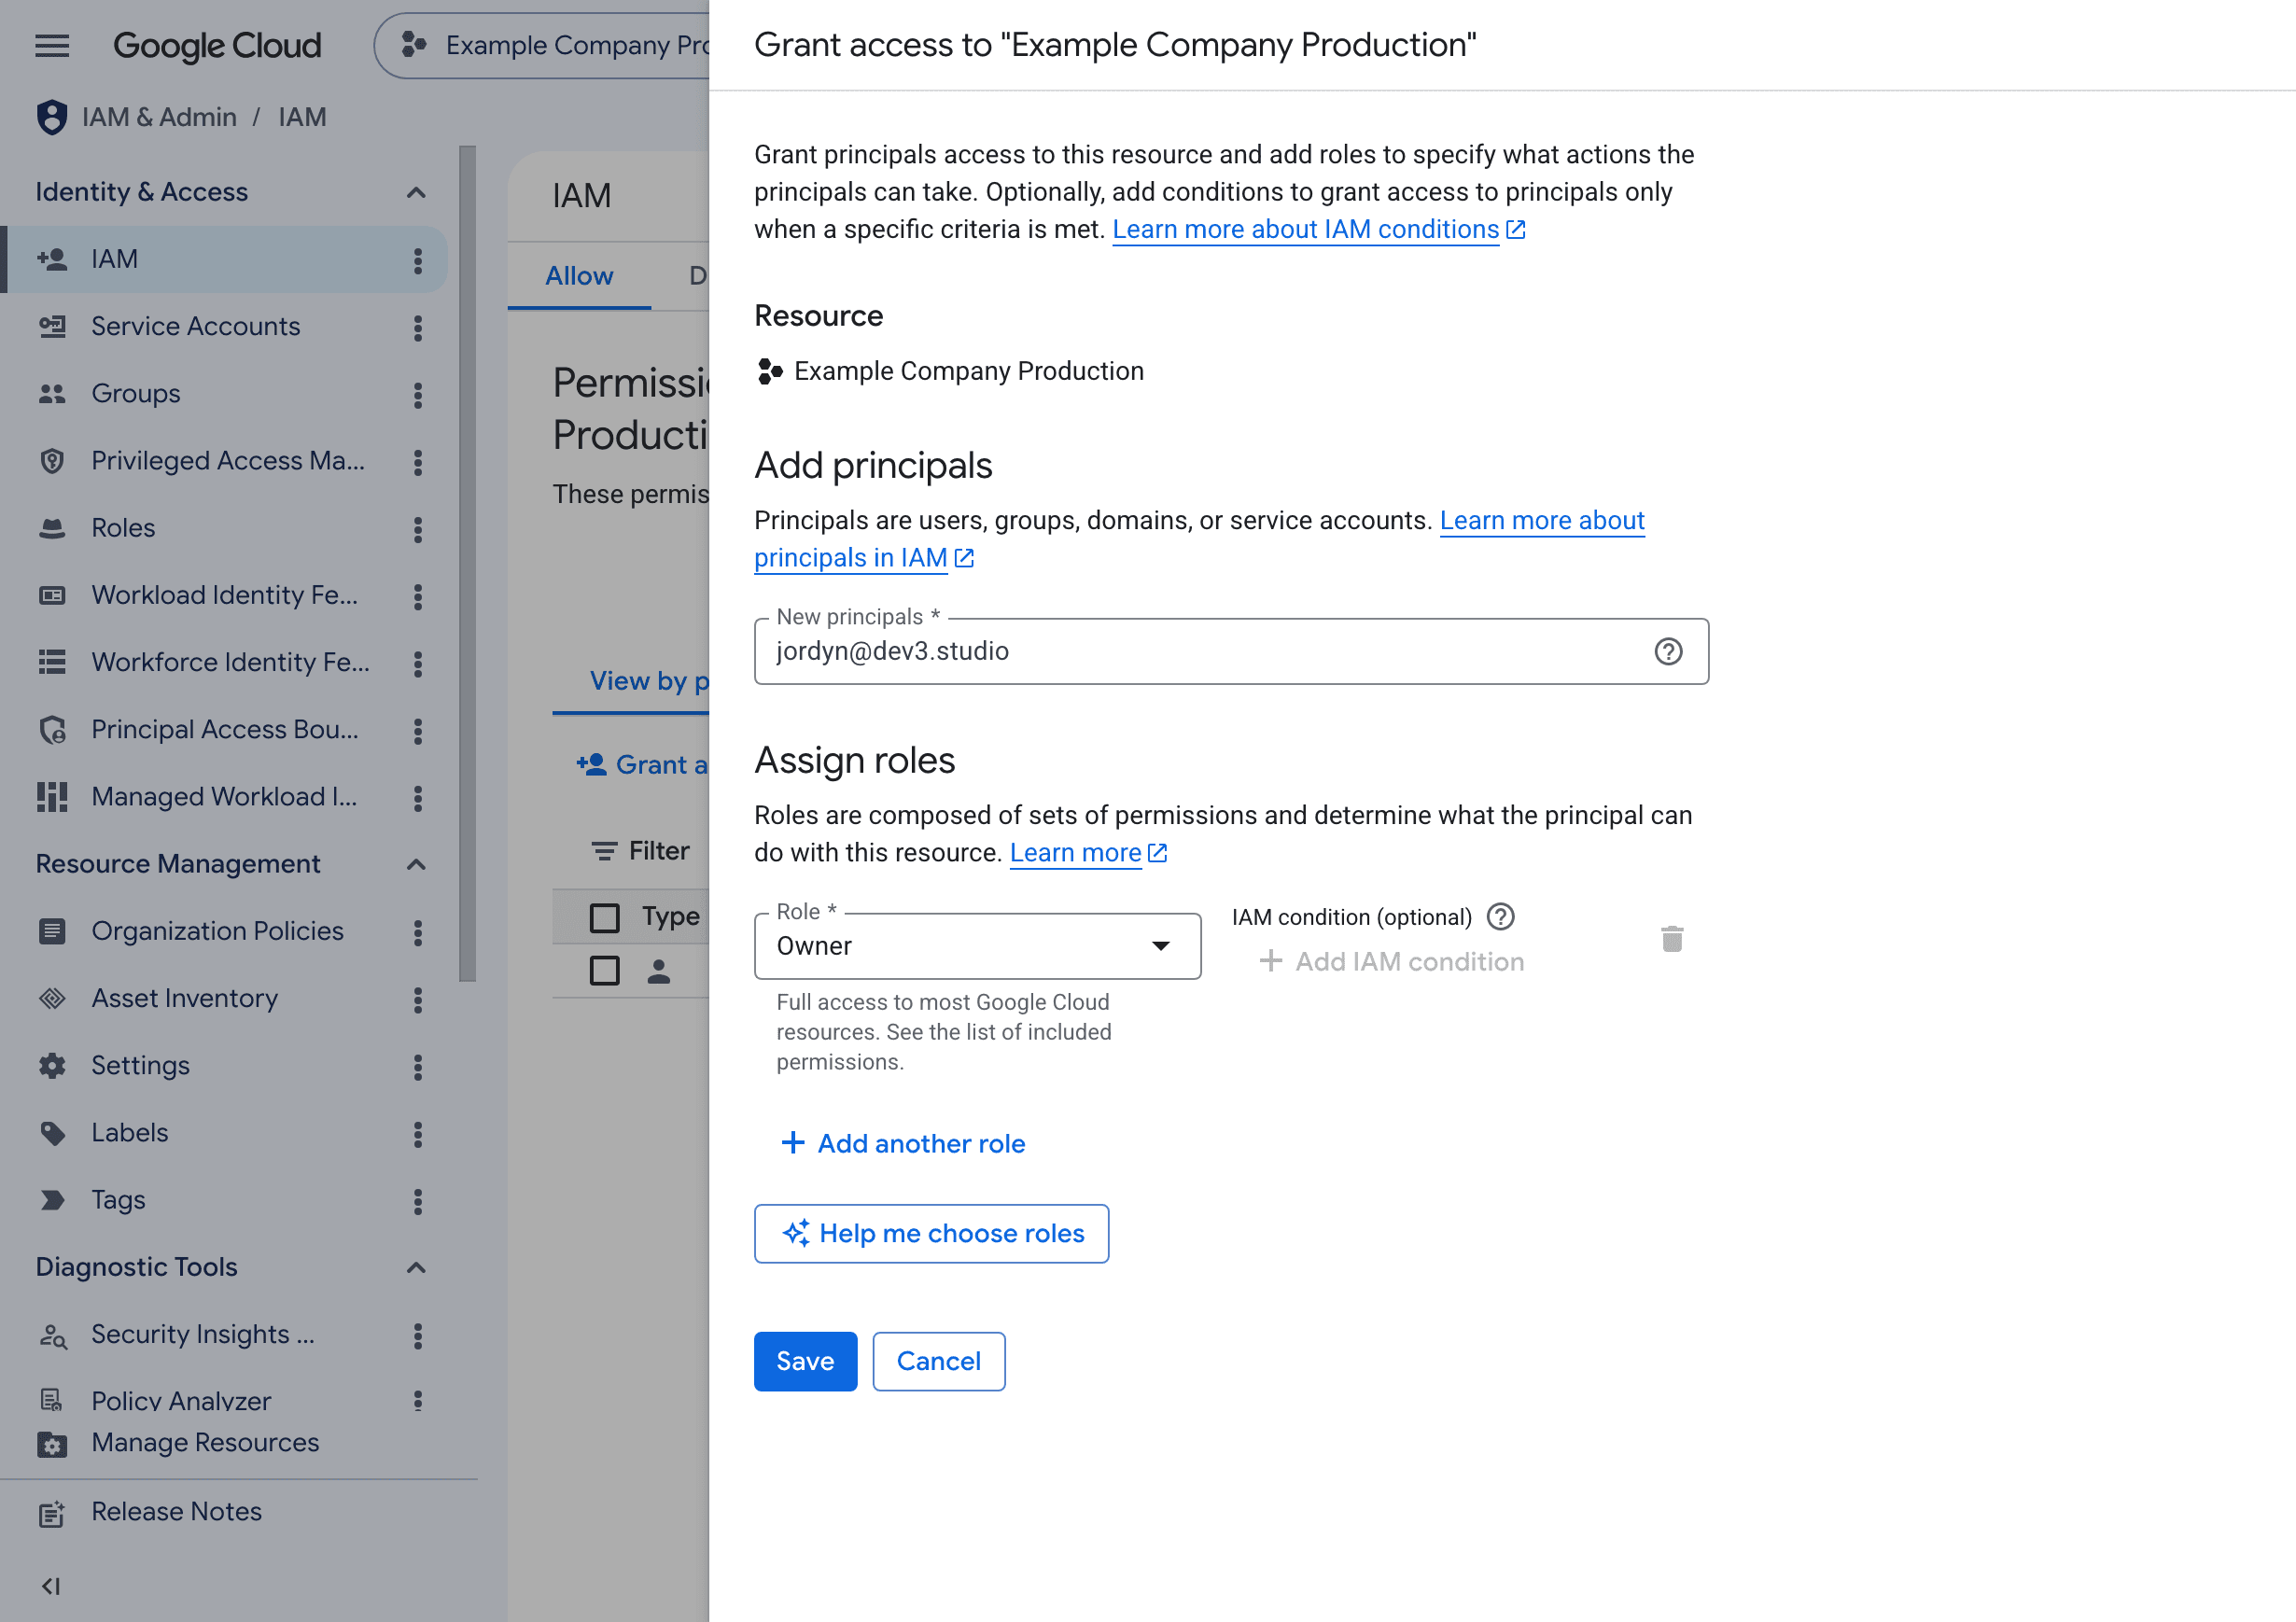
Now you'll give Dev3 Studio access to work in this project. With your project selected, go to IAM & Admin in the left menu, then click IAM. Click Grant access, type in the first of the two Dev3 Studio email addresses we've given you, and assign the Owner role. If you don't have our team's email addresses to hand, just ask and we'll send them through.
This gives us the ability to set up and manage the cloud services your project needs. Don't worry — this is project-level access only. It doesn't give access to your billing details or payment method.
Step 6: Grant Project Owner to the Second Dev3 Studio Team Member
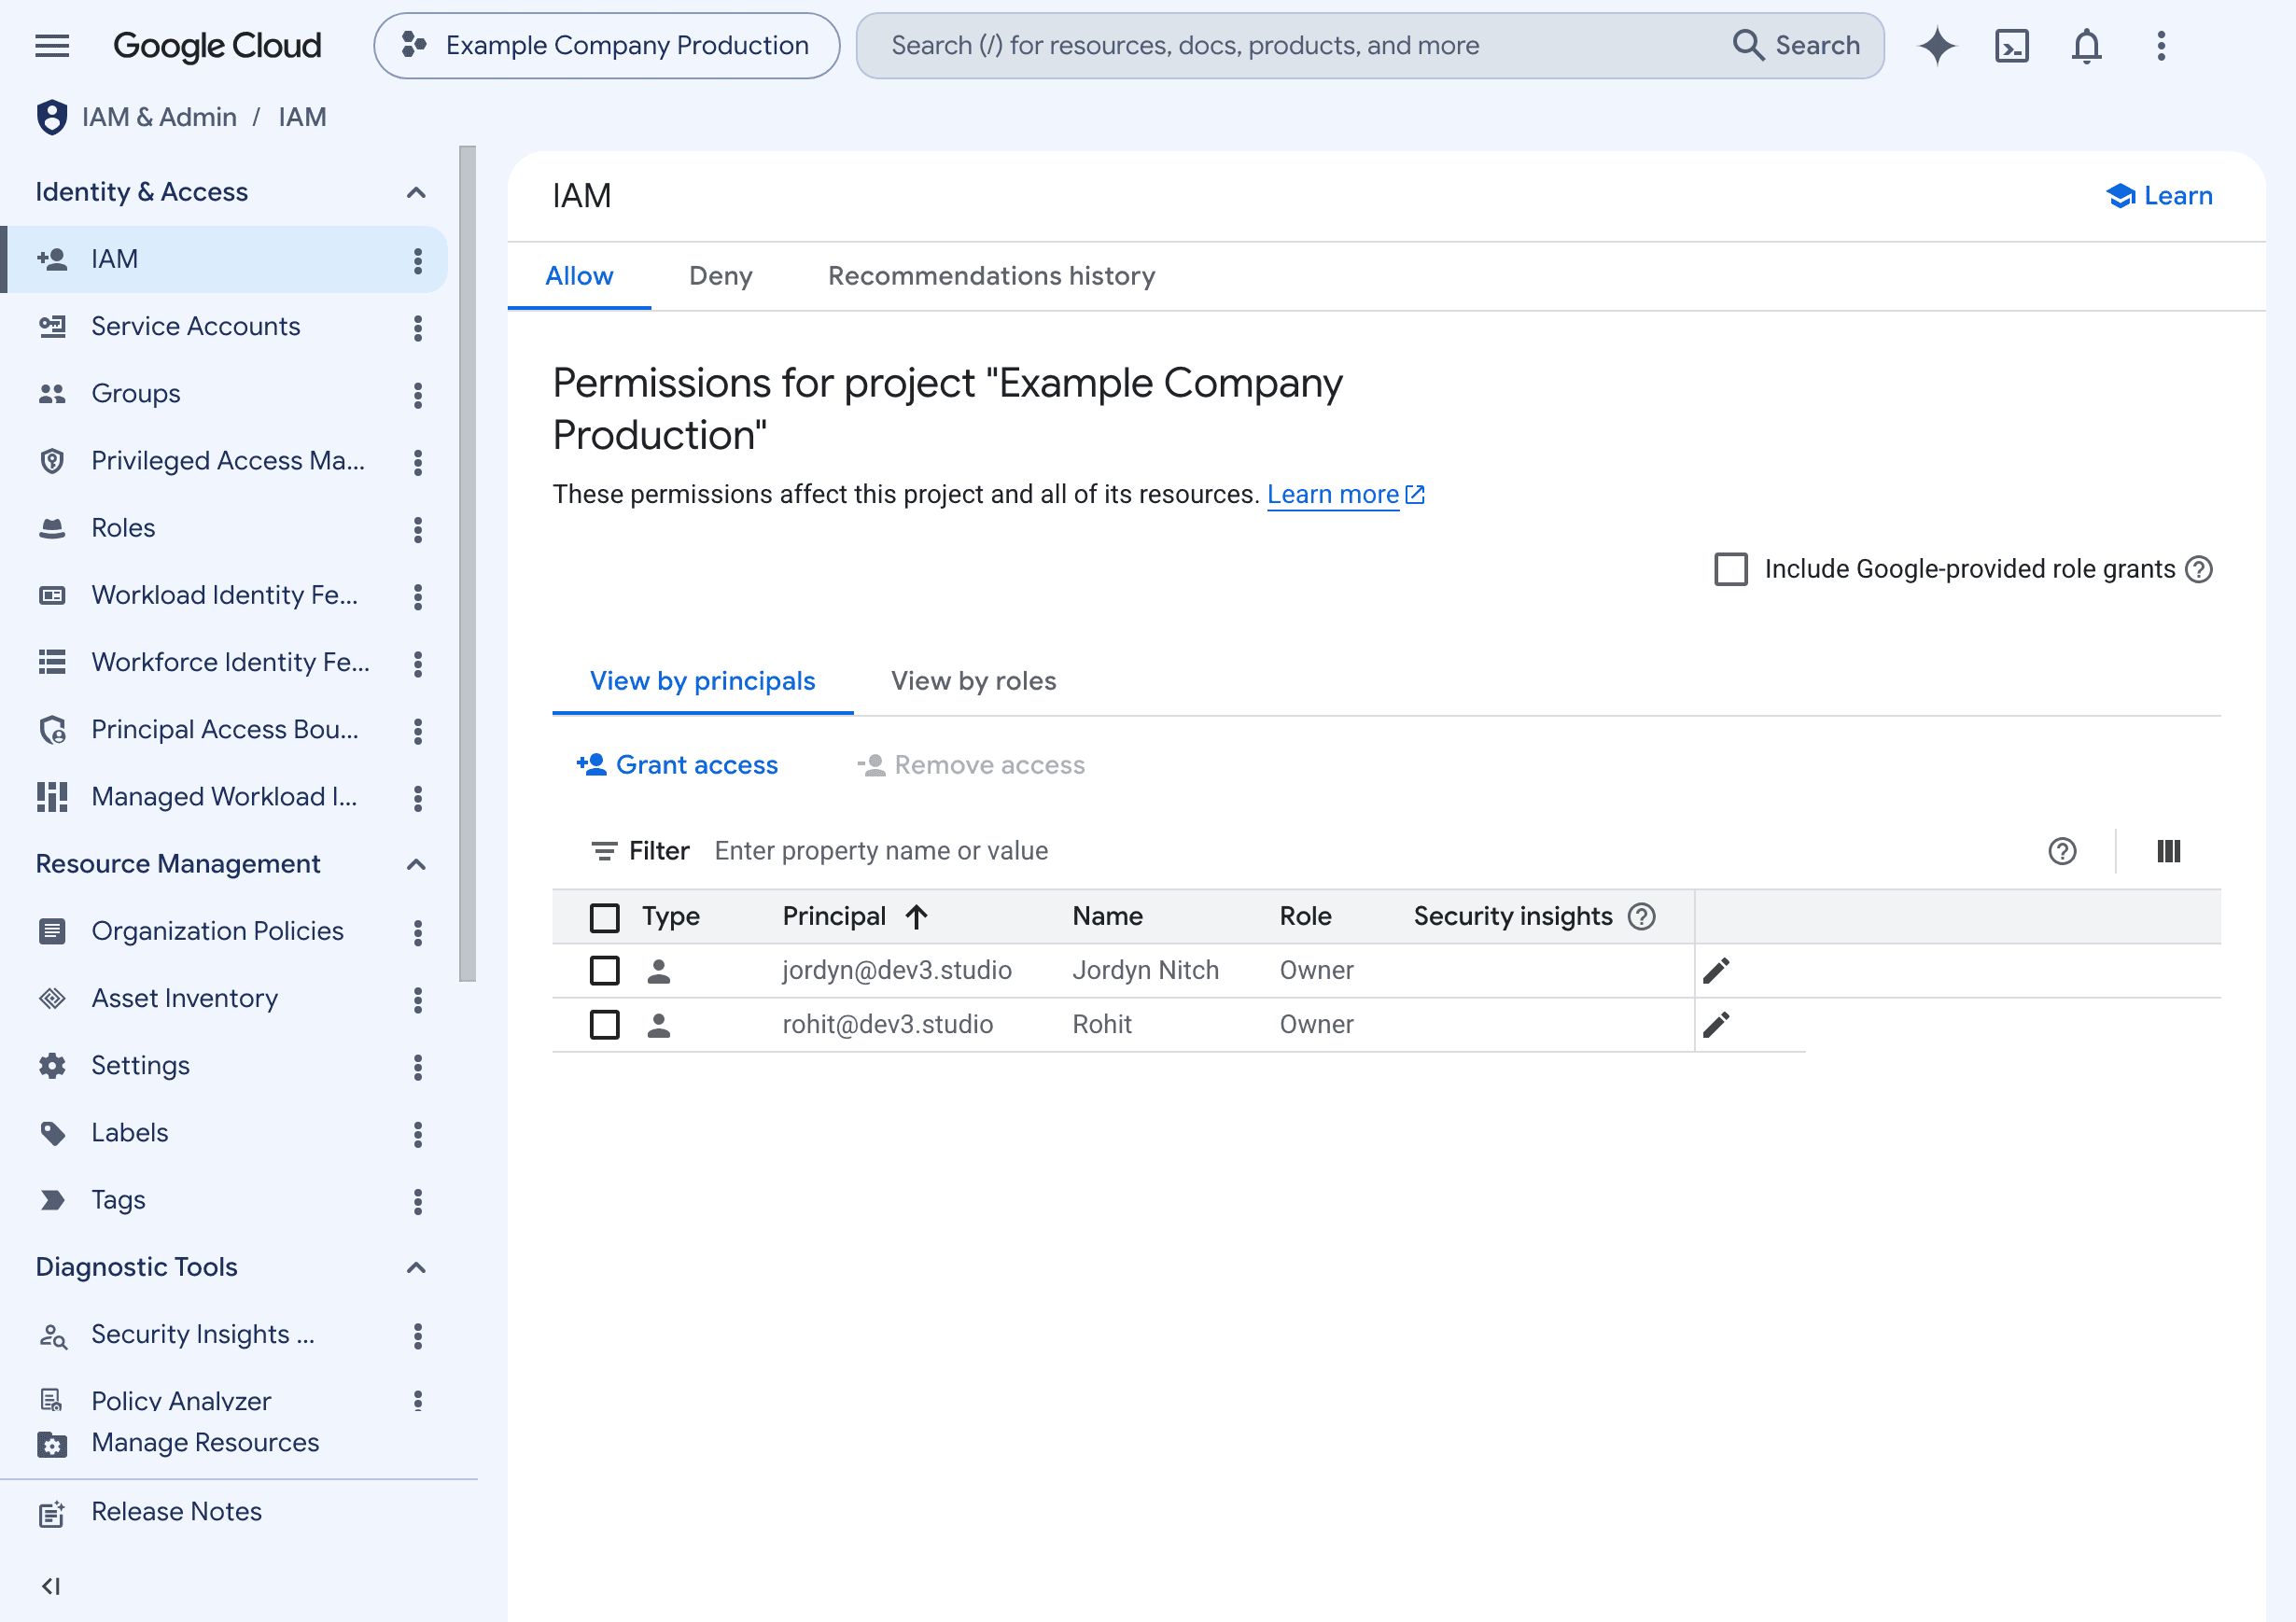
Repeat the same process for the second address. When you're done, both Dev3 Studio team members should appear as project Owners in the IAM list.
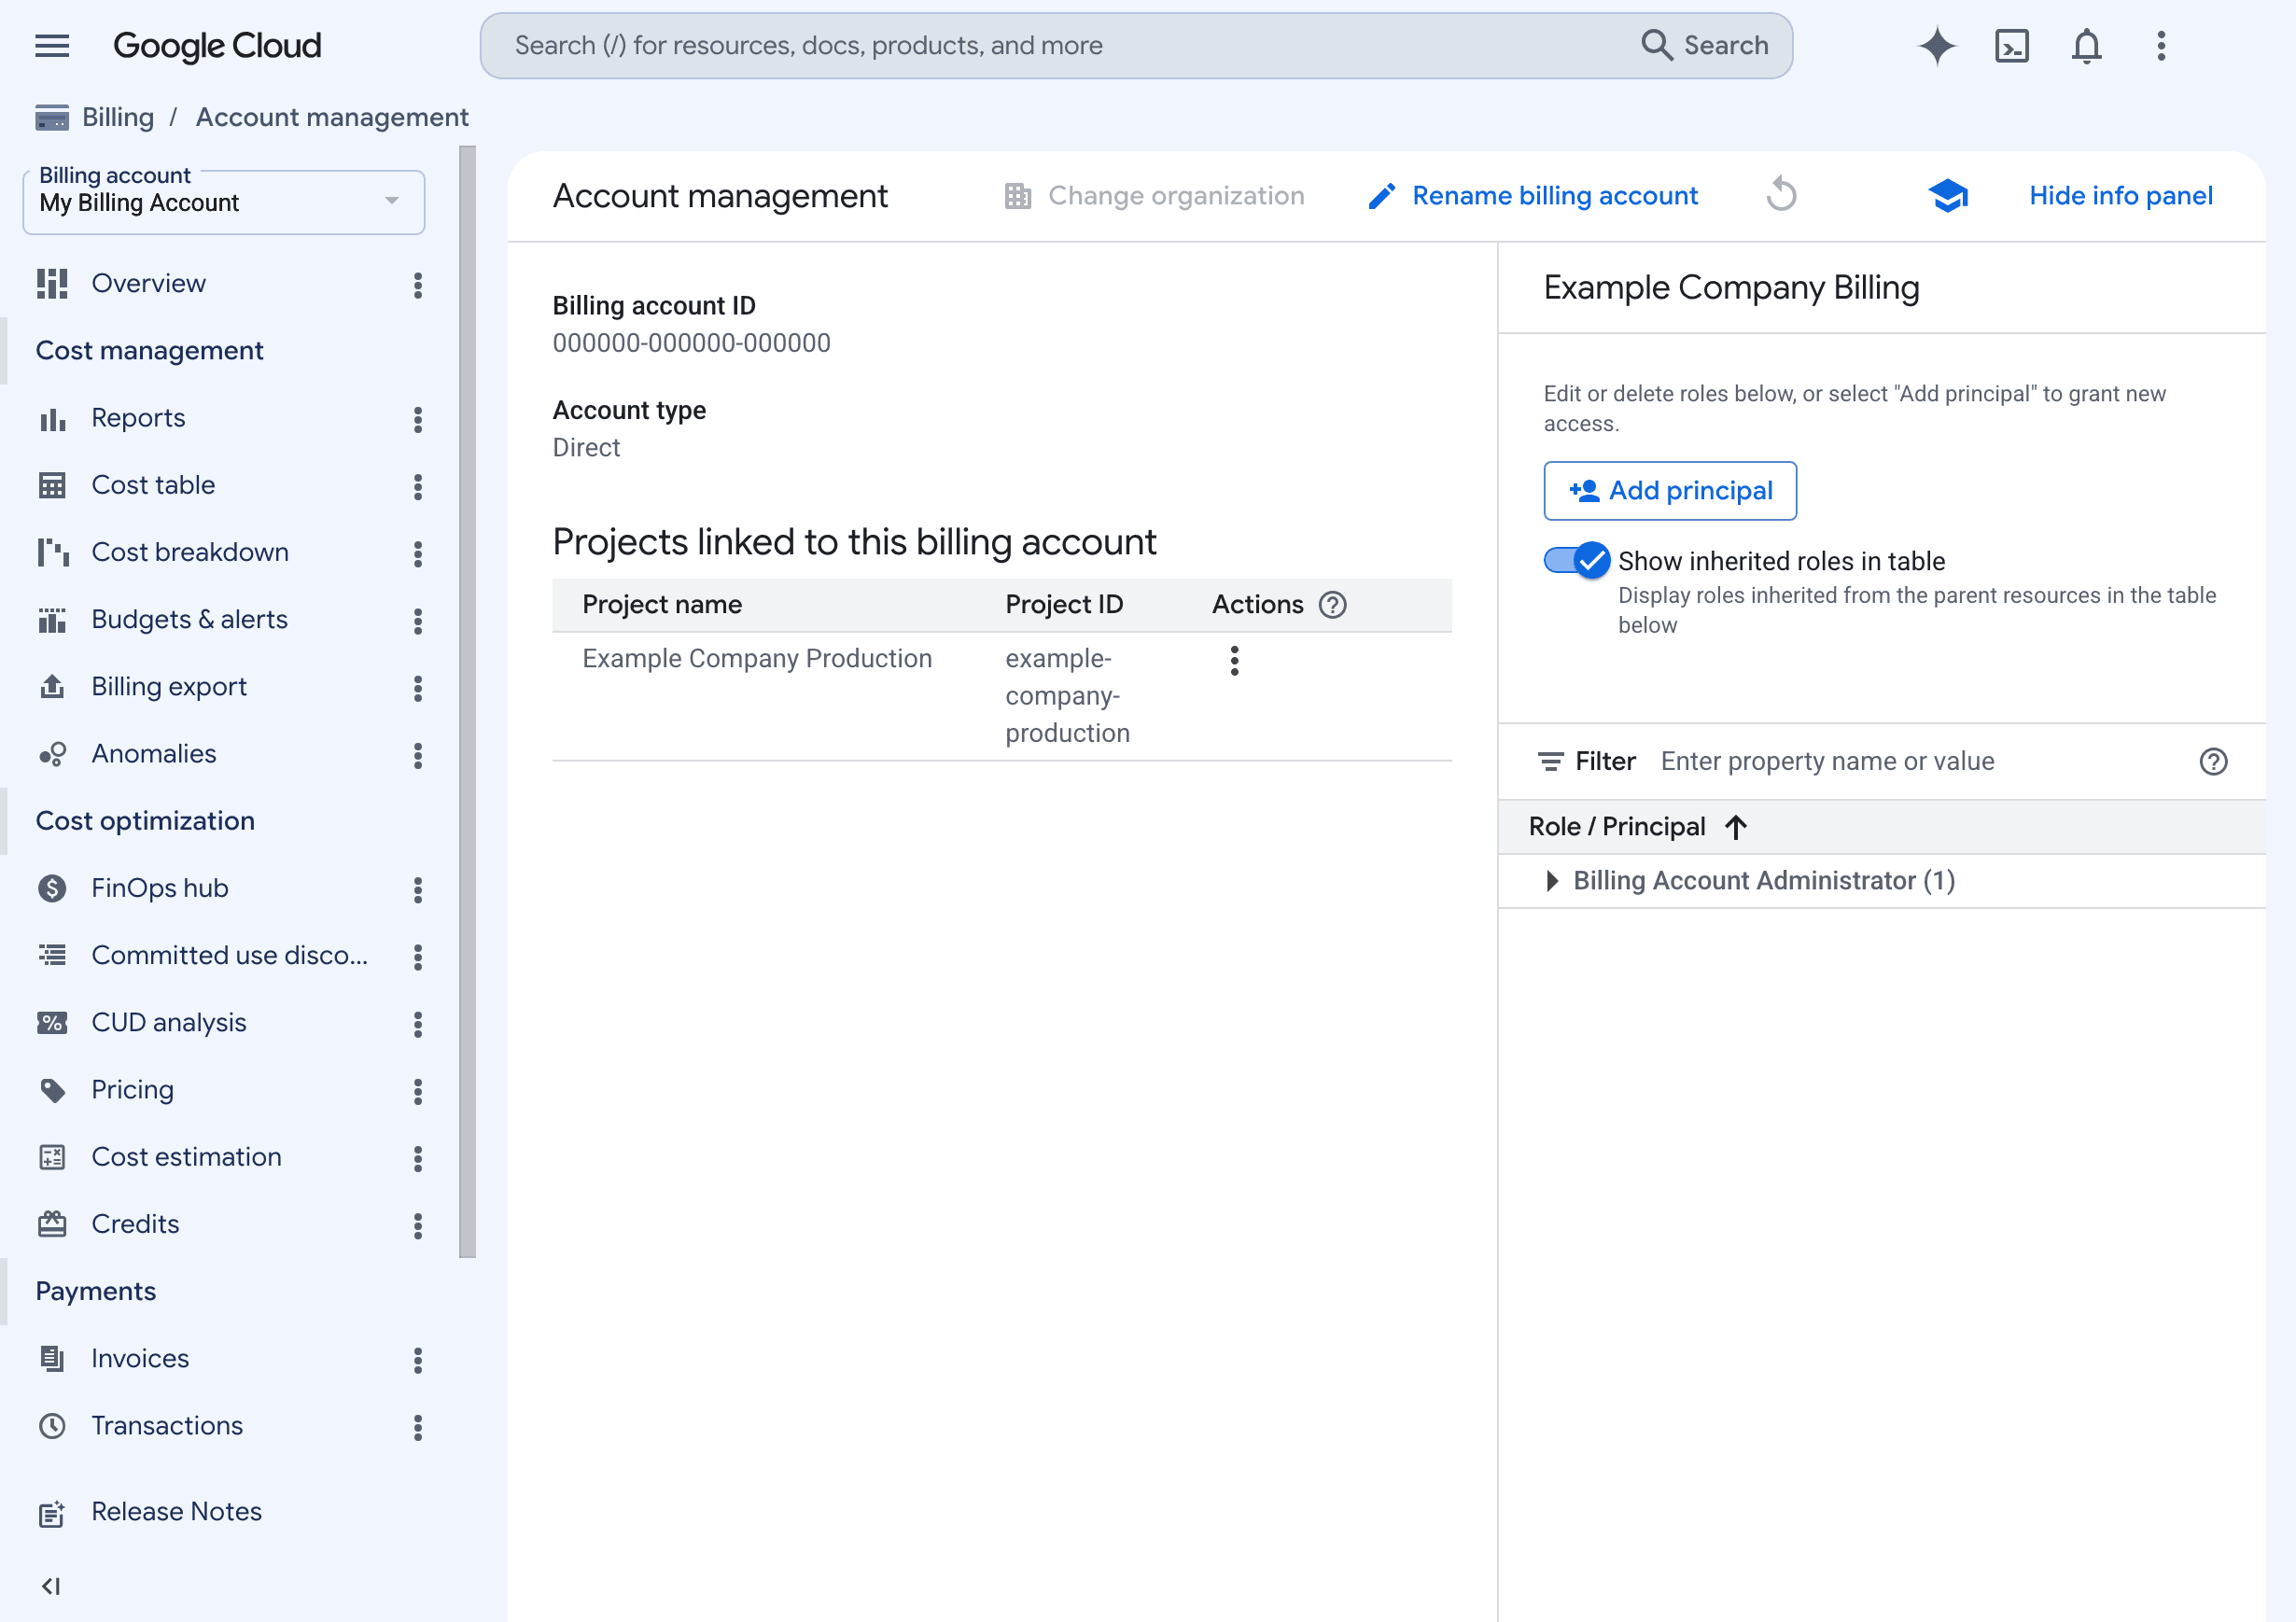
Step 7: Open Billing Account Permissions
Next, you'll give Dev3 Studio limited billing access — just enough to link new projects to your billing account when needed, but not enough to see your payment details or change your billing settings.
Go to Billing in the left menu, select your billing account (not the project), and open Account management or the permissions screen.
Step 8: Add Both as Billing Account Users
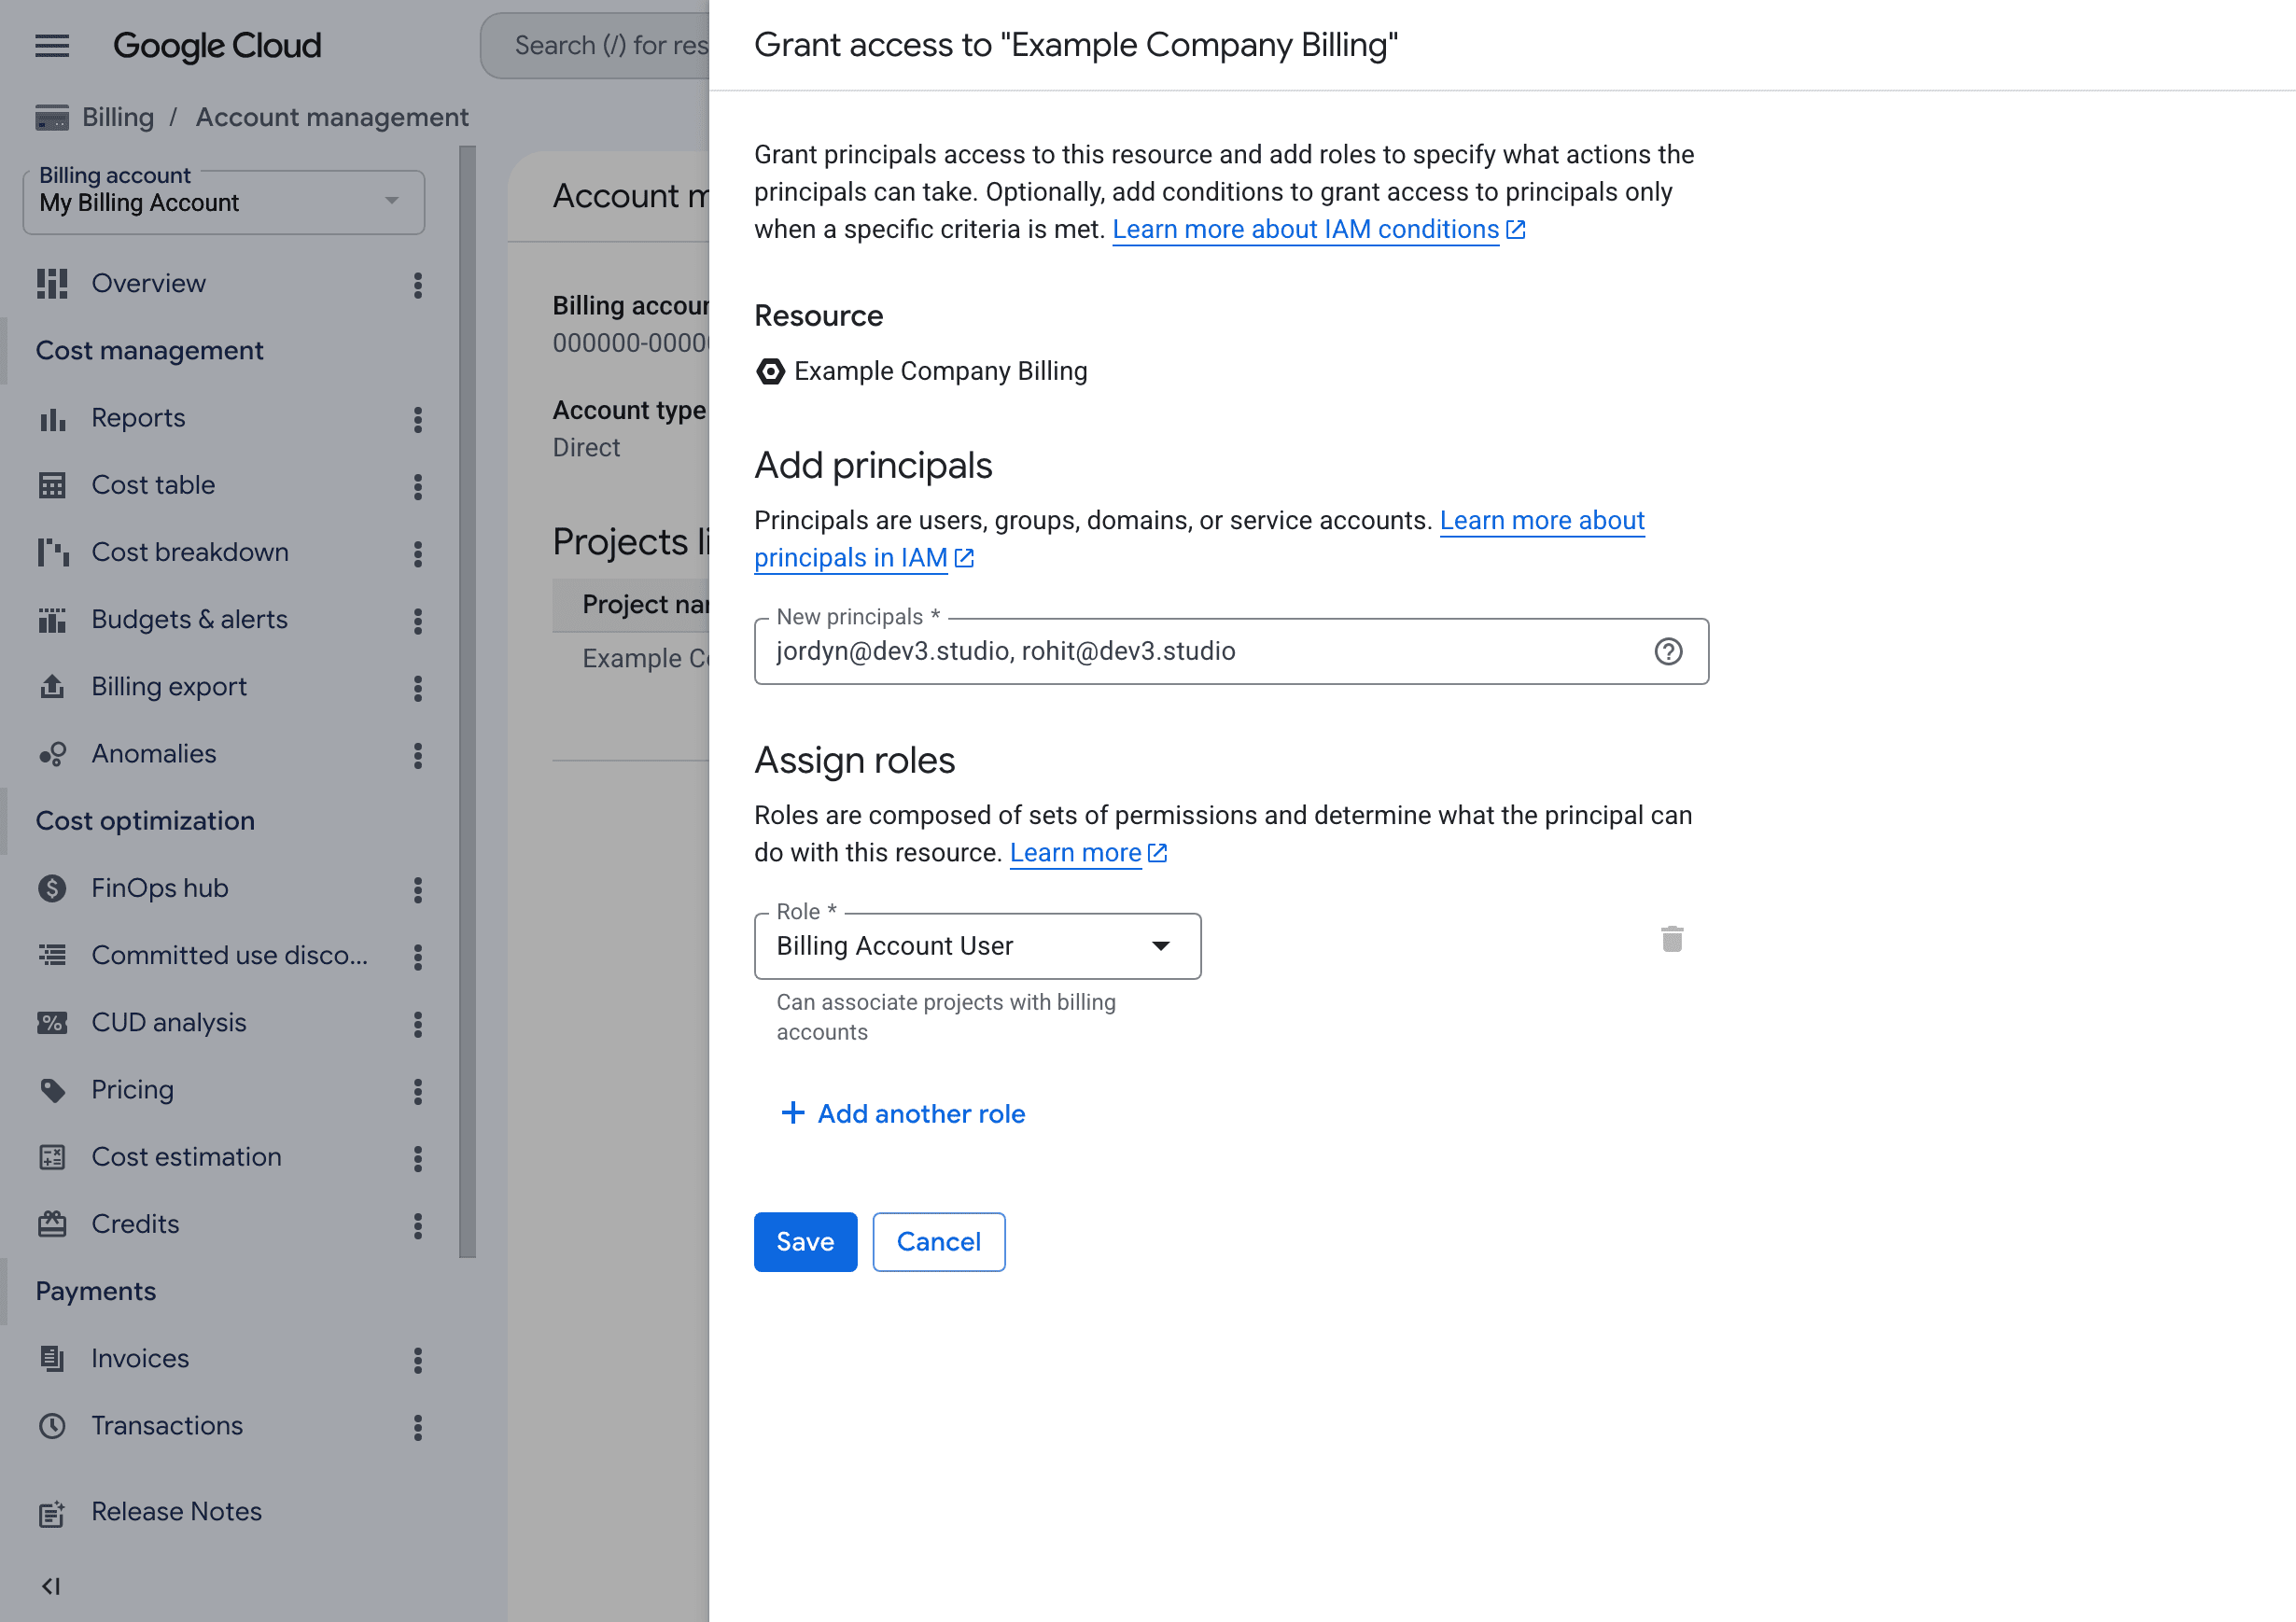
Add both Dev3 Studio email addresses with the Billing Account User role. This role only lets Dev3 Studio link your billing account to projects — it doesn't give access to your payment method, invoices, or billing administration.
Completion Checklist
Troubleshooting
- Your payment method is rejected: Double-check that the billing country, business details, and card information are correct and match. If it keeps failing, contact Google Cloud Billing Support.
- You can't find the project: Use the project selector dropdown at the top of the page to search for it. Also make sure you're signed in with the right Google Account.
- Dev3 Studio can't link billing to a new project: This usually means the Billing Account User role was granted on the project instead of on the billing account itself. Go back to Step 7 and make sure you're in the billing account's permissions, not the project's.
Security Reminder
You're in control of everything that matters. You own the Google Cloud account, the billing account, and the payment method. The project Owner role is powerful — it lets Dev3 Studio set up and manage cloud services — but it doesn't give access to your billing administration or payment details. Keep 2-Step Verification turned on for all users, and when our engagement ends, you can remove Dev3 Studio's access anytime from the IAM page.