
How to Create a DigitalOcean Account
DigitalOcean is a cloud platform where your app's servers, databases, and storage live. Think of it as renting the computers that run your website or application. You'll own the account and handle billing, while Dev3 Studio uses it to build and manage the technical side of your project.
What You'll Need
- A company email address — use one that belongs to the business (not a personal Gmail), since this will be the permanent owner of the account.
- A payment method — a credit or debit card. DigitalOcean may place a small temporary hold to verify it.
- An authenticator app on your phone — like Google Authenticator or Authy. You'll use this to add an extra layer of security to your login.
Expected Costs and Timing
Creating the account is free. You only start paying when we set up actual servers or databases for your project — and you'll always see the price before anything is created. The whole setup takes about 10 minutes, though DigitalOcean occasionally takes a little longer to verify new payment methods.

Step 1: Create Your Account
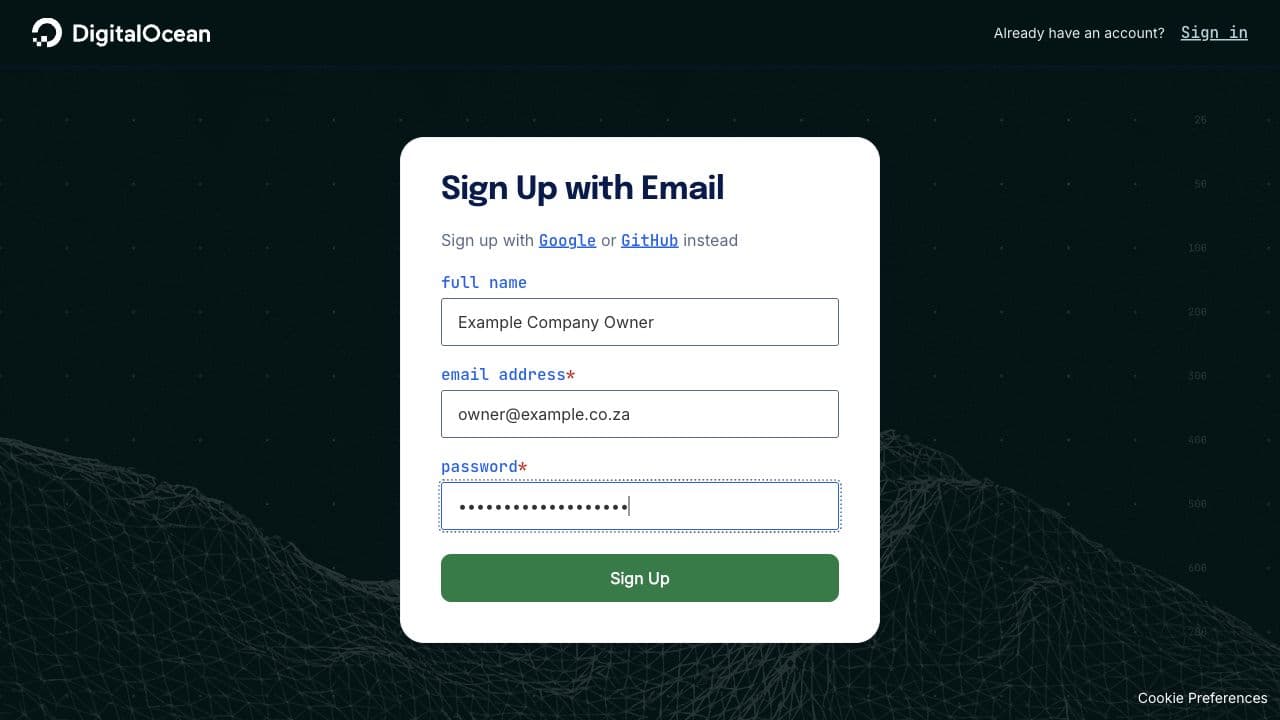
Head to the DigitalOcean sign-up page and register using your company email address. This account will belong to your business, so use an email that the right people in your company can always access.
Step 2: Verify Your Email and Turn On Two-Factor Authentication
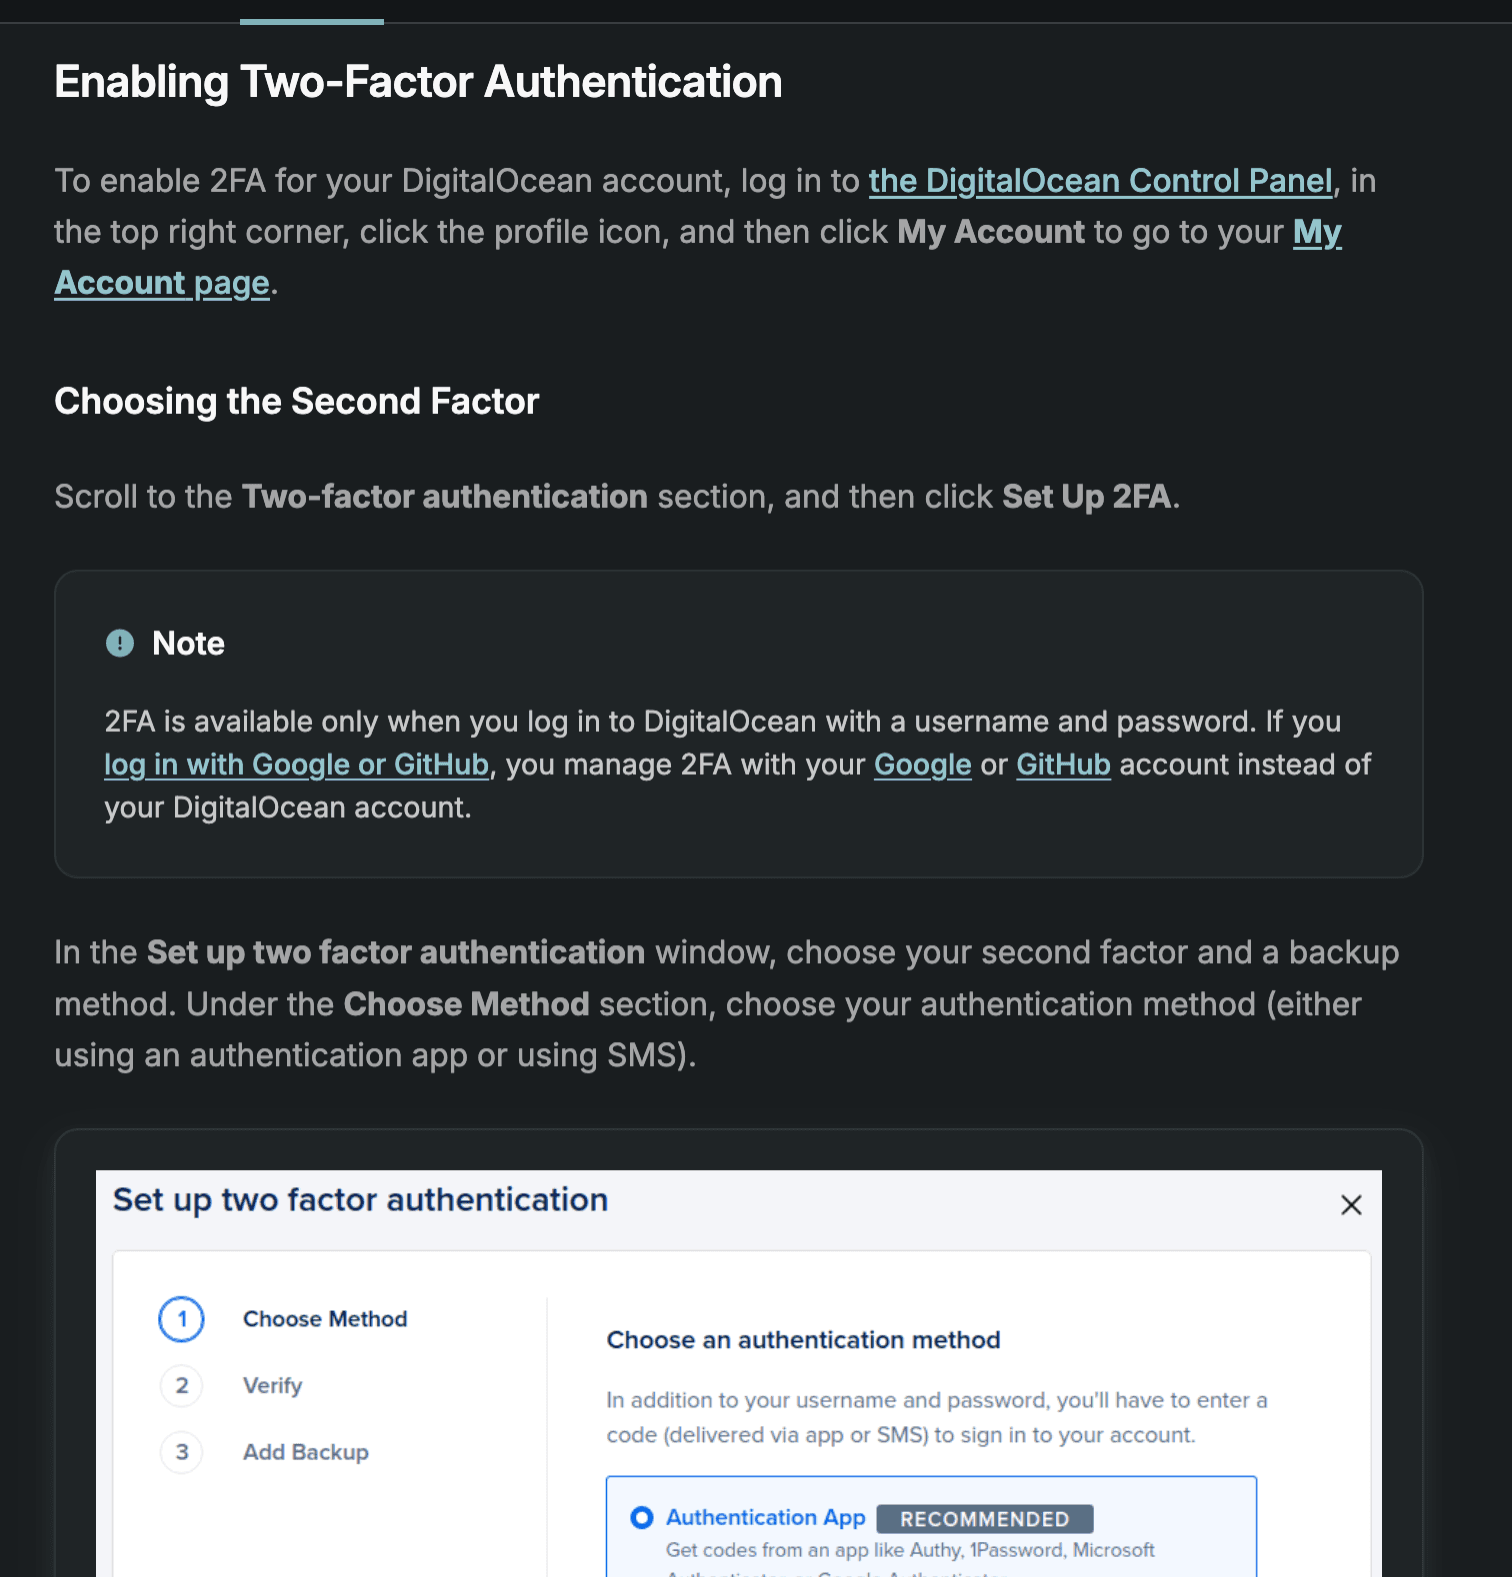
After signing up, check your inbox for a verification email and click the link. Once you're logged in, go to your security settings and turn on two-factor authentication (2FA) — this means you'll need both your password and a code from your phone to log in, which keeps the account much safer. Save the recovery codes somewhere secure in case you ever lose access to your phone.
Step 3: Set Your Team Name
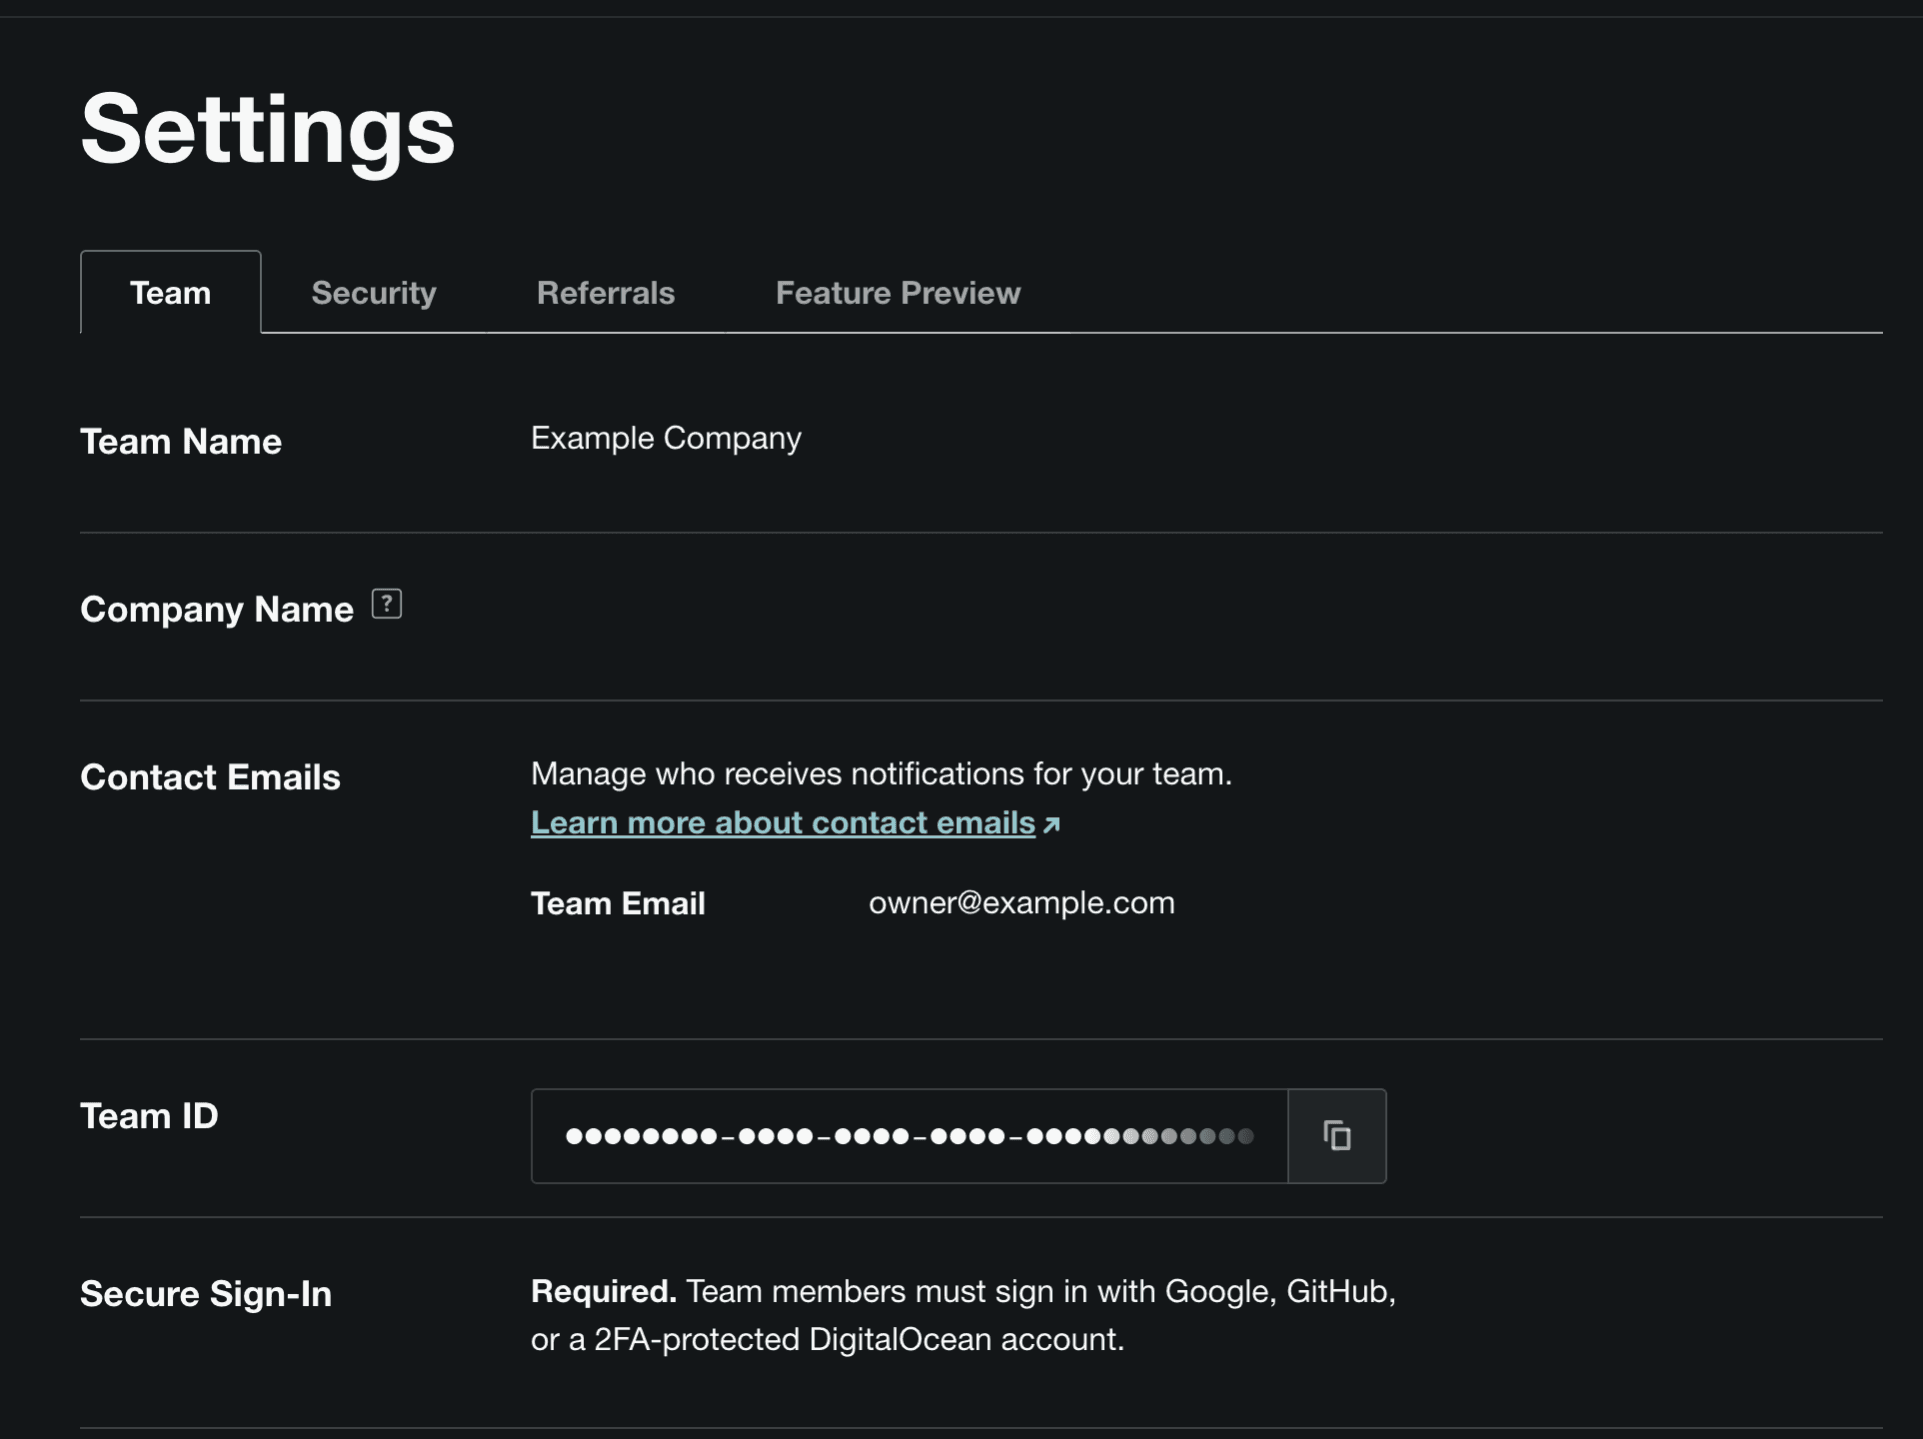
DigitalOcean automatically creates a team when you register. Open Settings, find the team name, and change it to your business name. This keeps things organised if you ever work with multiple teams down the line.
Step 4: Add Your Payment Method
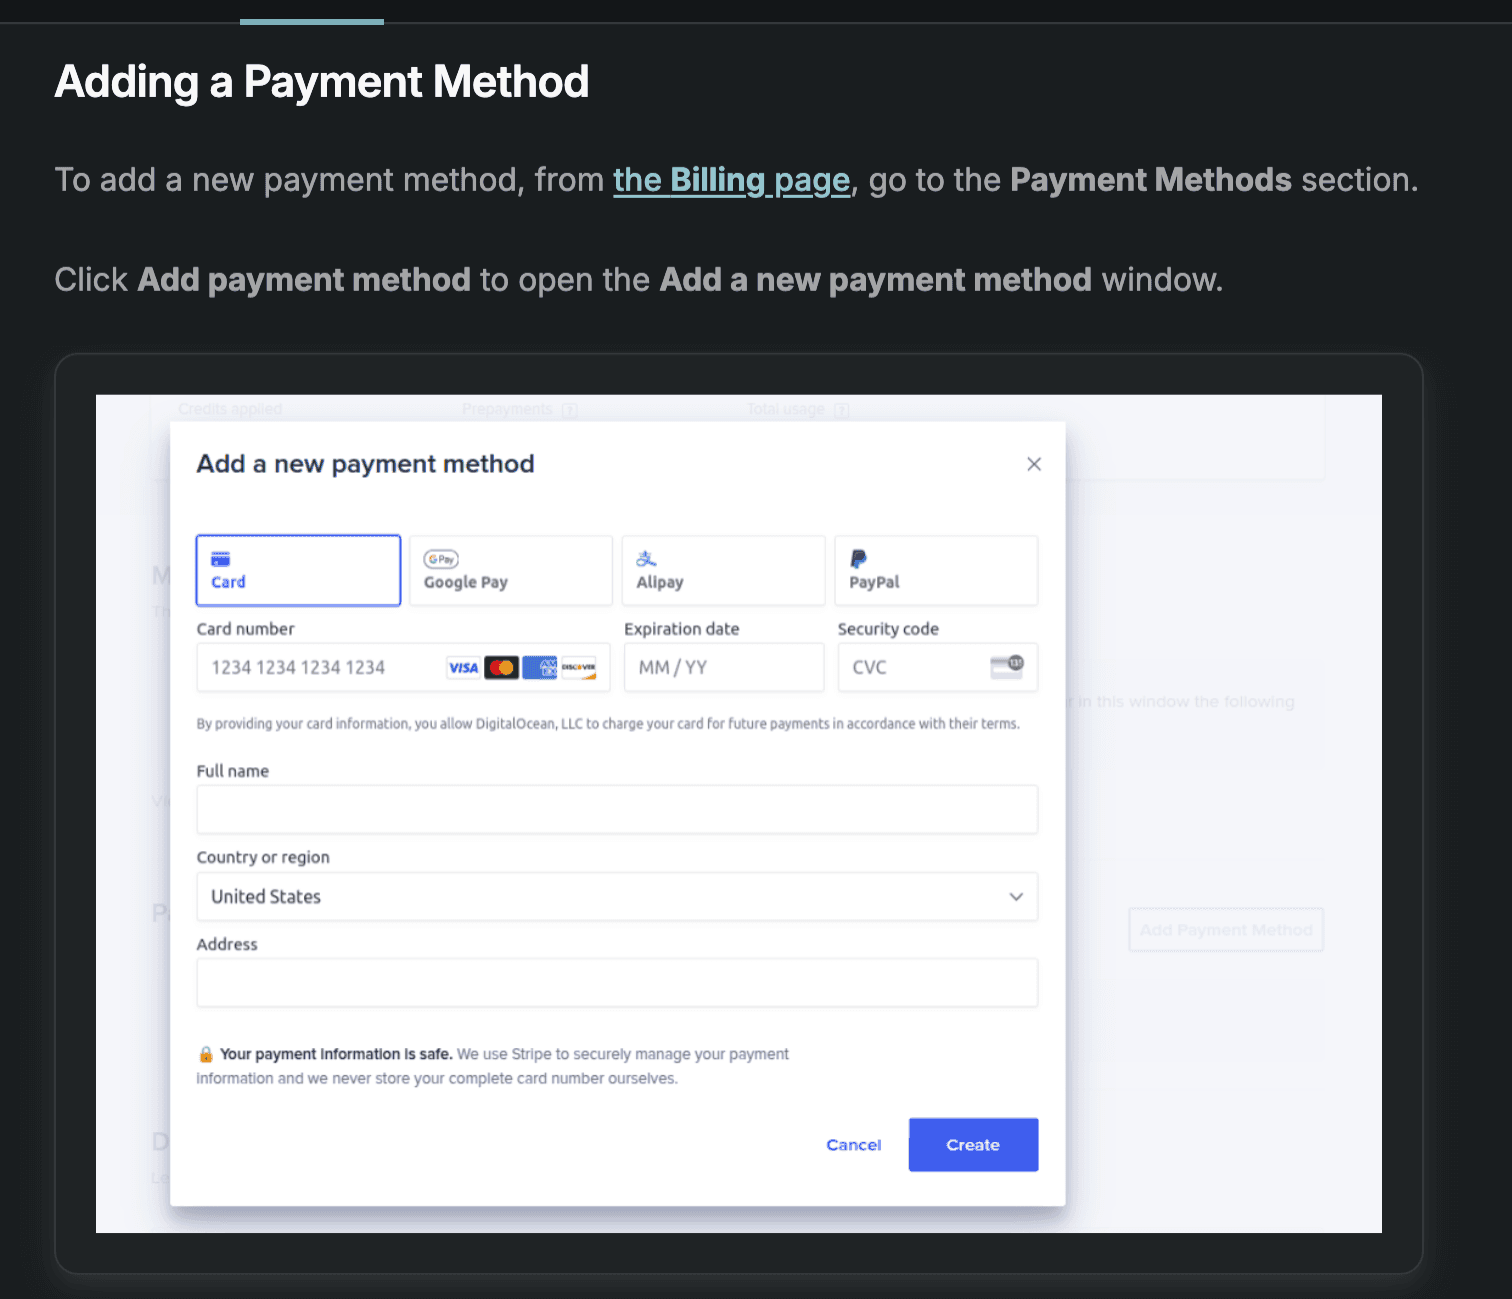
Go to Billing and add your credit or debit card. DigitalOcean may ask you to complete a quick verification step — this is normal. Nothing will be charged until we actually create resources for your project.
Step 5: Open the Team Members Section
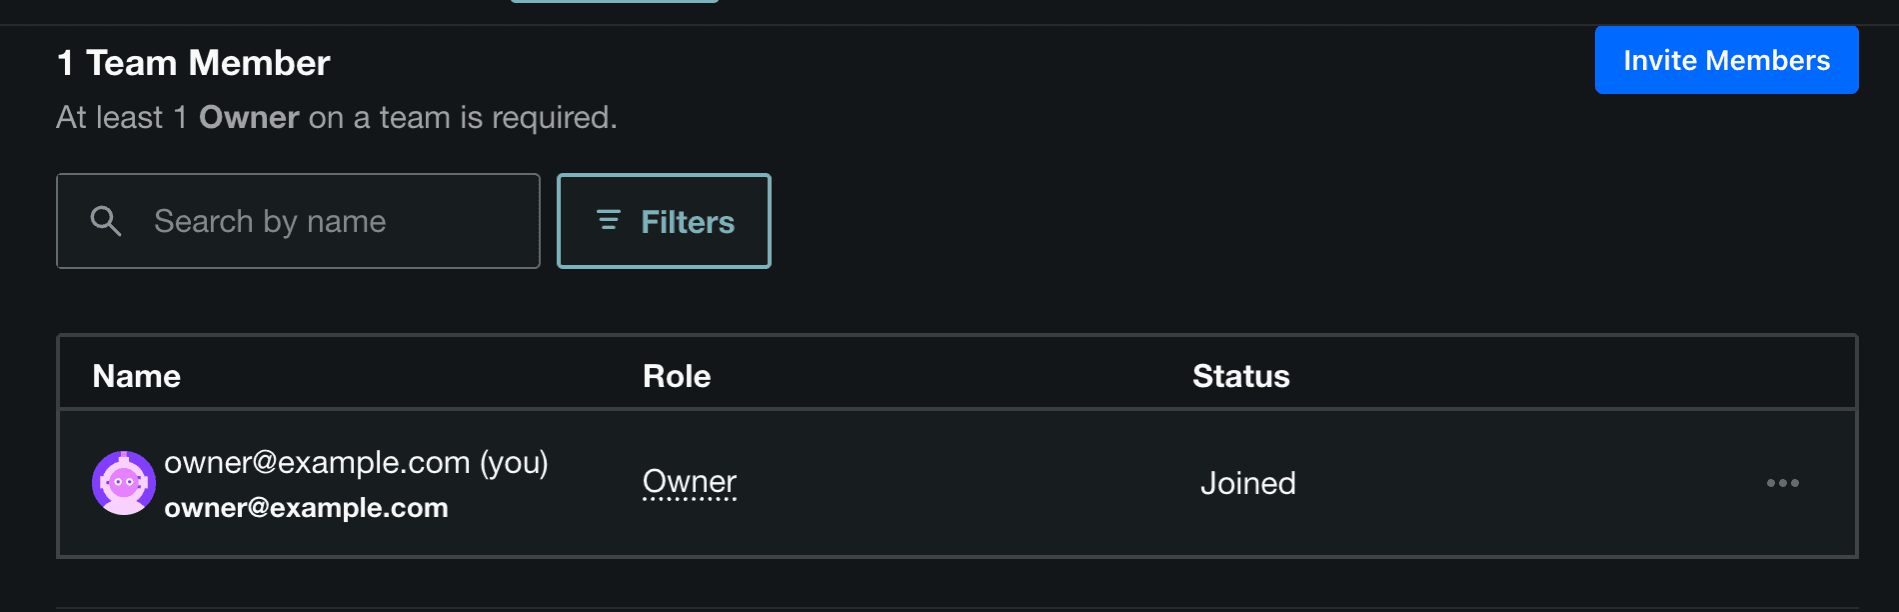
Make sure you're viewing the correct team, then go to Settings and find Team Members. Click Invite Members.
Step 6: Invite Dev3 Studio
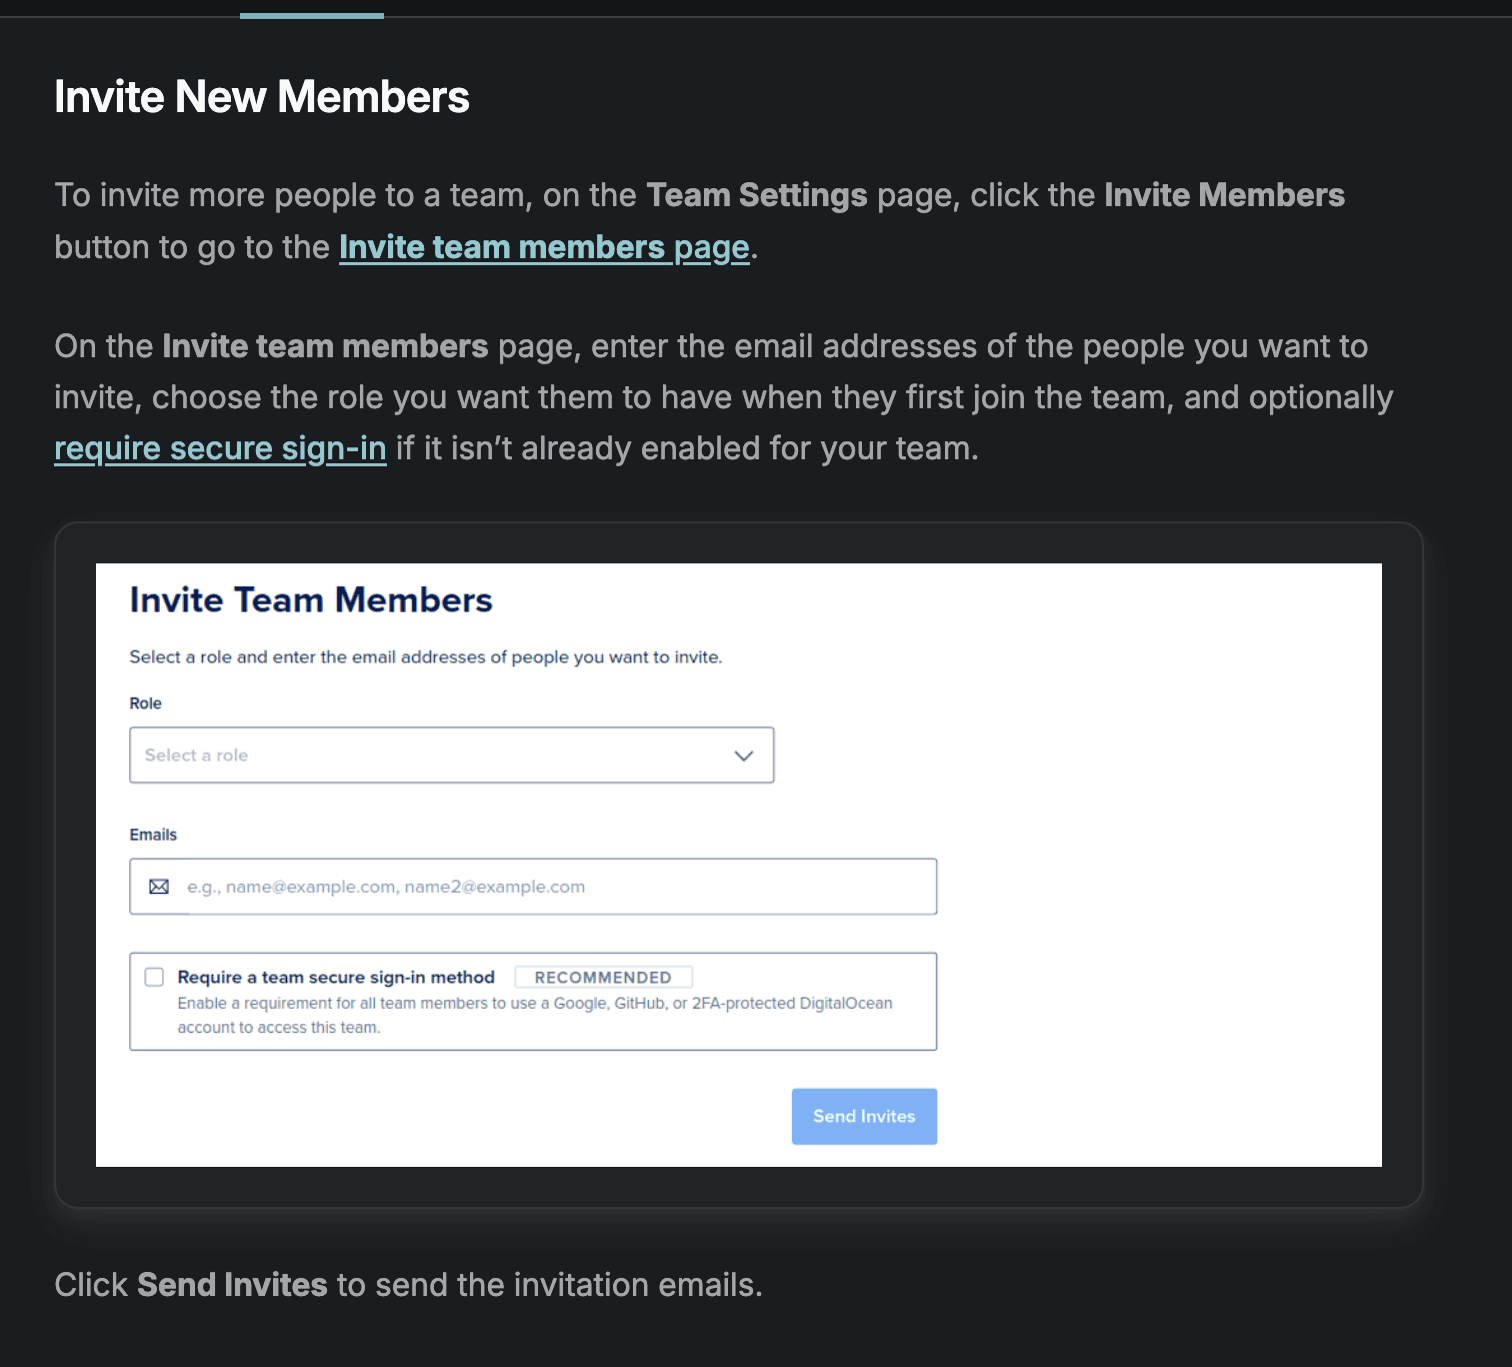
Enter the two Dev3 Studio email addresses we've given you — if you don't have them to hand, just ask and we'll send them through. For the role, choose Member — this is important because it lets us build and manage your technical resources without being able to see or change your payment details. Turn on the secure sign-in requirement, then send the invitations.
Step 7: Check That the Invitations Are Pending
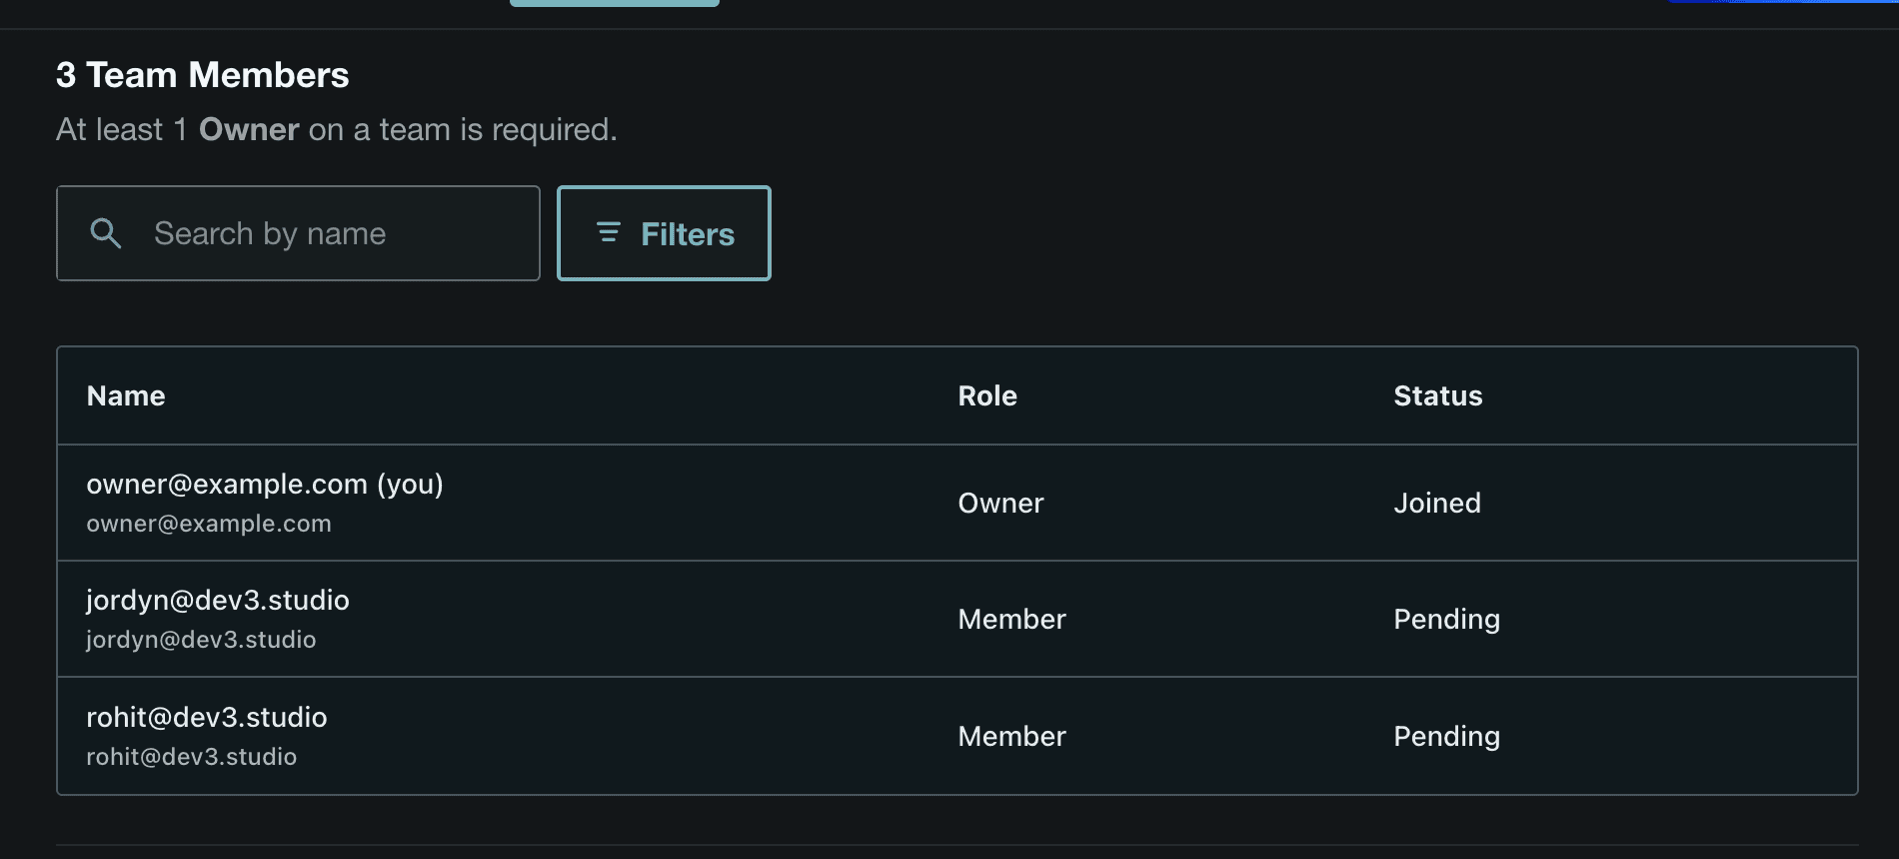
Go back to the members list and make sure both email addresses show up as Pending with the Member role. If something looks off, you can resend or cancel an invitation from this same screen. Let us know once you've sent them so we can accept promptly.
Completion Checklist
Troubleshooting
- Your account or team is restricted: This usually means DigitalOcean needs you to finish a payment or identity verification step. Check your dashboard for any banners or prompts.
- Dev3 Studio didn't receive the invitation: Double-check the email addresses for typos, ask us to check our spam folders, and try resending from the Team Members screen.
- Dev3 Studio can see your billing information: Check that both users have the Member role — not Owner, Biller, or Billing Viewer. You can change roles from the Team Members screen.
Security Reminder
You're always in control. As the account Owner, only you can manage billing and account-level settings. As Members, we can build and manage your technical resources but we can't see or change your payment details. Keep two-factor authentication turned on, and if you ever stop working with someone, you can remove their access from the Team Members screen at any time.